Hello, everyone! My name is Amy, and my corner of the blogging world is known as Positively Splendid, a place where I share all about the art and soul of a handmade lifestyle. I would love for y’all to stop in for a visit! Today I’m going to share with you a last-minute framed Valentine’s Day project that utilizes an unexpected medium – fabric – as a way to punch up your typography projects.All set? Let’s get started!

Supplies:
Word processing software and printer
Heavyweight fusible interfacing Fabric (I recommend a something solid, like the denim I used here)
Disappearing ink marker
Coordinating thread
One 8×10-inch frame
One 12×12-inch piece of scrapbook paper
Adhesive vinyl
transfer paper
A die cutting machine
Dimensional foam adhesive dots
Ribbon (optional)
Other: Basic sewing supplies (machine, shears, etc.)
Step One Make templates to use for your numbers (2 and 4) using your word processing software and print them out. (I used Rockwell Extra Bold font at 300 pixels.) Cut your templates out, and set them aside.
Step Two Cut three pieces from your fabric that are just larger than your templates. Iron your interfacing to the back of each of these pieces according to the product instructions. Using a disappearing ink marker, trace your templates onto the back of these pieces (trace a number 2 on two of the pieces, and a number 4 on the remaining piece), making sure to trace the reverse of each number so it is properly aligned when you cut it out. (See photos below.) Cut your numbers out, and then carefully stitch a couple of times around the outer perimeter of each for added interest. Set your pieces aside.

Step Three Use your die cutting machine to format the following lettering and symbols to cut from your vinyl:
Play around with different sizing and fonts until you achieve a look your like. The fun here comes in mixing and matching different typefaces! I used Courier New (sweet), Engravers (be), and Lobster (gotten). Once you are satisfied, refer to your respective machine’s instruction manual for the appropriate settings to cut your lettering from your vinyl.
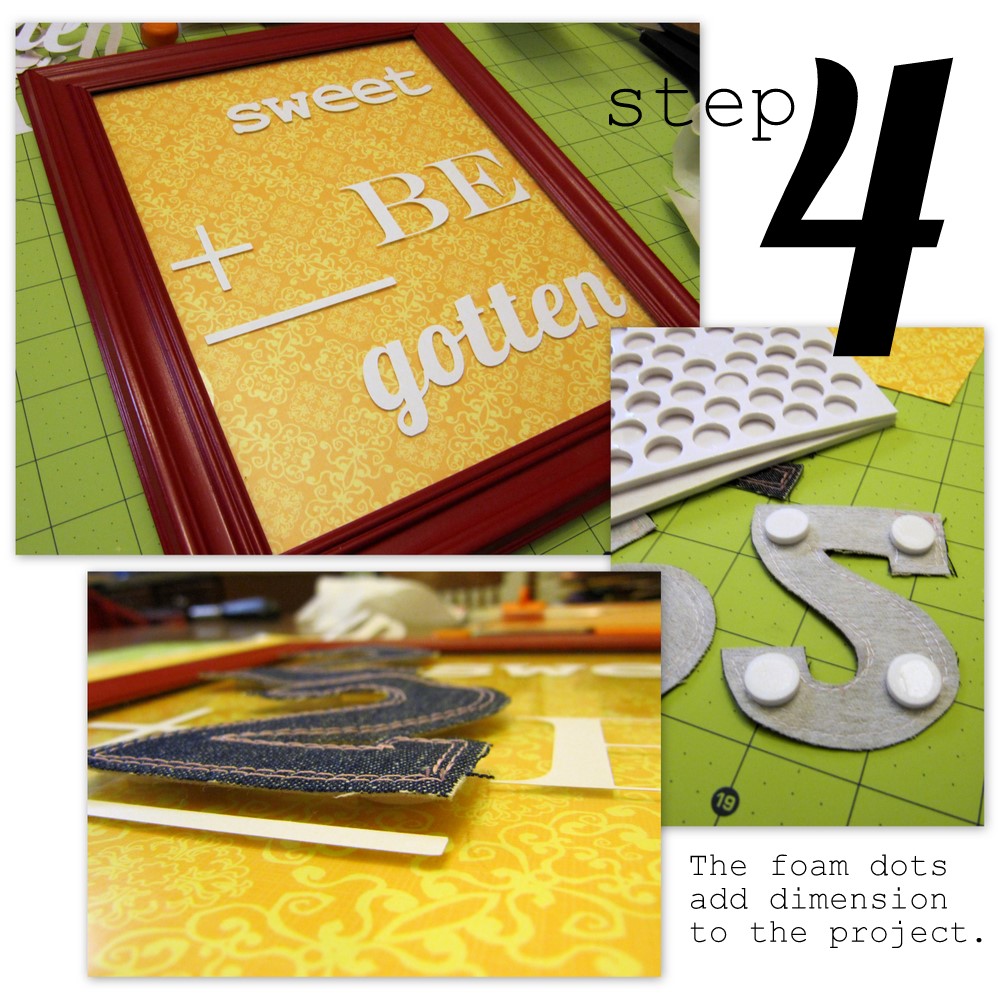
Step Four Cut your patterned paper down to 8×10, and place it in your frame. Use your transfer paper to adhere your vinyl lettering and symbols to the glass front of your frame as shown. Place foam dots on the back of your fabric numbers, and adhere them as shown. For added dimension, I stacked two layers of dots on the back of the number four to give it an extra boost. Now, tie a bow from a length of ribbon, and adhere it with foam dots to the top corner of your frame.


— Amy www.positivelysplendid.com
Twitter: @splendidamy