I am Madigan from Madigan Made. I’m a 30-something working gal who lives with my hubby and pup in the northeast. I love to write about simple home decor and craft projects on my blog. (with the occasional easy recipe sprinkled in for good measure!)
When it comes to crafty equipment, I love my sewing machine, my crafty cutter and my paint brush. But I have to say, two of my most versatile tools in my tool box are my glue gun and a can of spray paint. Today, I wanted to share a project that uses both of those.
If you have never been to my blog, you should know that I love painting objects white.
I think that white paint can unify decor and make old items look more modern. Most recently, I painted the inside of my apothecary jars white to simulate the look of milkglass. You can read more about my addiction ode to white paint in this post..
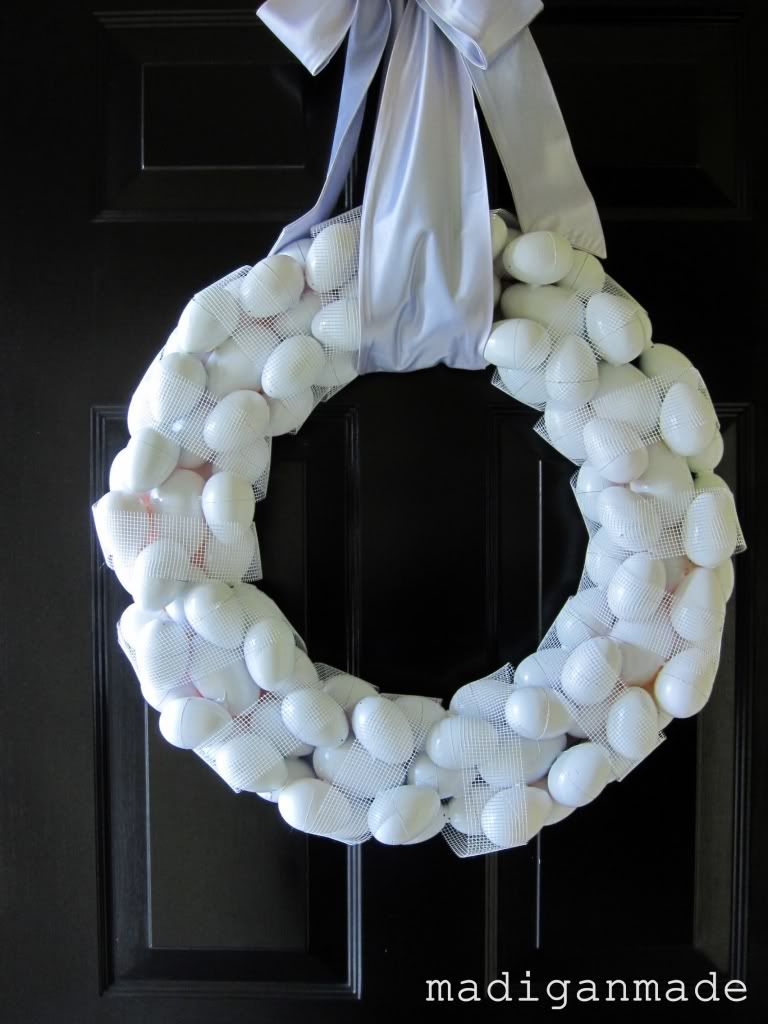
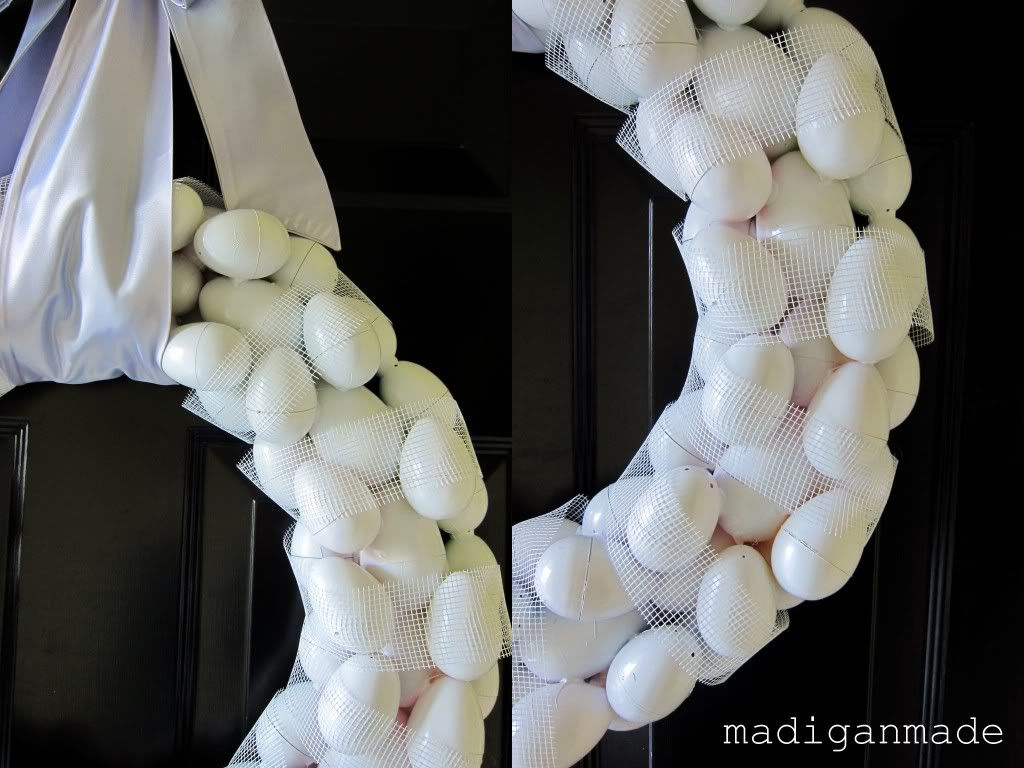
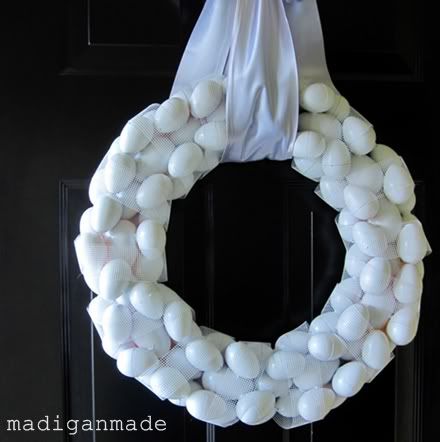
For Easter, I wanted to make a simple, big white wreath with eggs. I raided the dollar store for cheap plastic eggs and they worked perfectly. (Side note: I have to confess that I initially tried to make a white wreath out of malted milk balls, but that turned into a huge mess!)
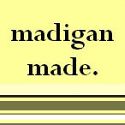
This egg wreath needed a little something more, so I added "ribbon". Yes, if you look closely, that is NOT white ribbon wrapped around the wreath. It is dry wall tape instead! Sometimes a girl’s gotta get creative with materials!
Here is how I made this wreath:
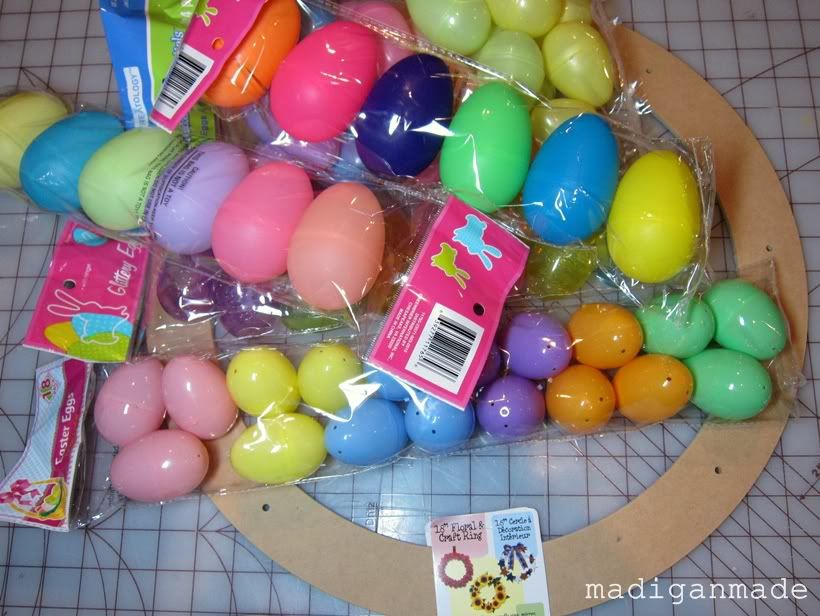
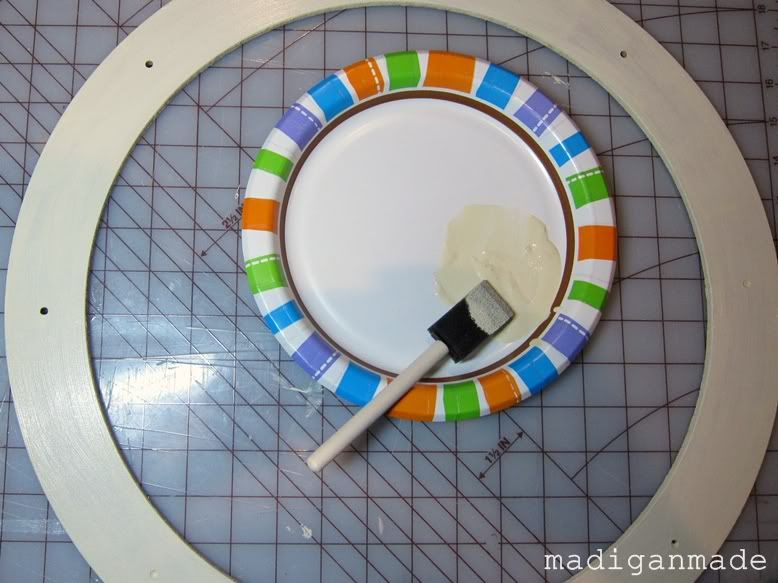
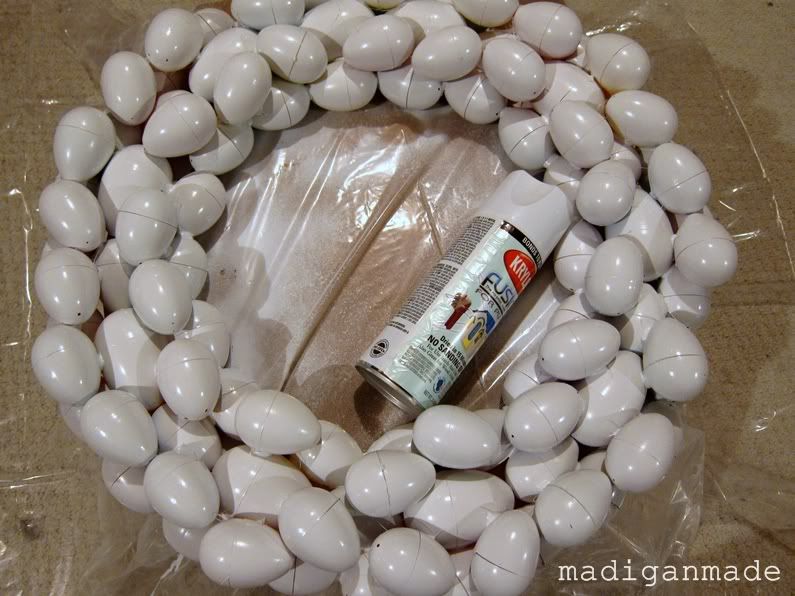
Supplies used: 18" wooden wreath form White craft paint 100+ plastic Easter eggs, various sizes White spray paint (for plastic) Glue & glue gun Dry wall tape Duct tape Wide ribbon or scarf Step 1: I started by painting the wreath form with cream white craft paint.
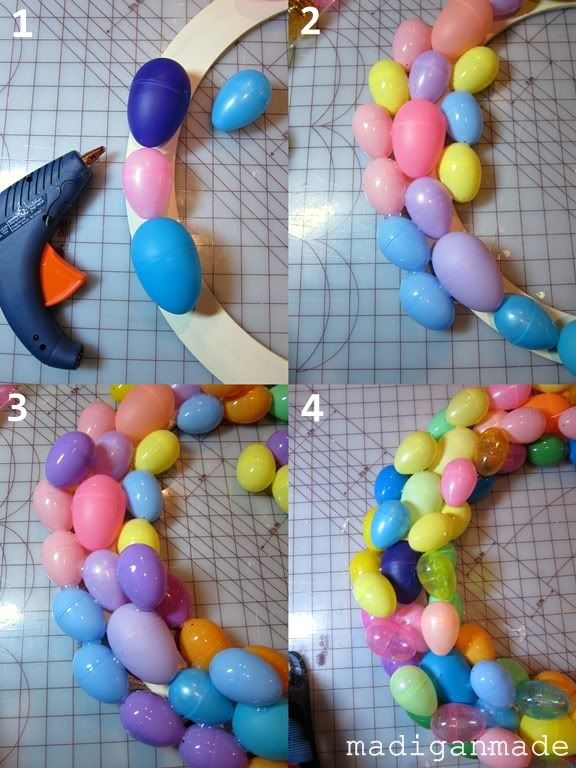
Step 2: Then I glued down all the eggs with my glue gun. I glued down one single layer around the wreath. Then I went back and just added more rows of eggs till it looked right. I kept the tapered end of each egg pointing in the same direction. I used a little over 100 eggs for the whole thing. After you glue these down, do your best to remove all the glue gun ‘strings’ that might hang from the wreath. Once painted, the strings will really stand out. (read: not cute!) Tip:
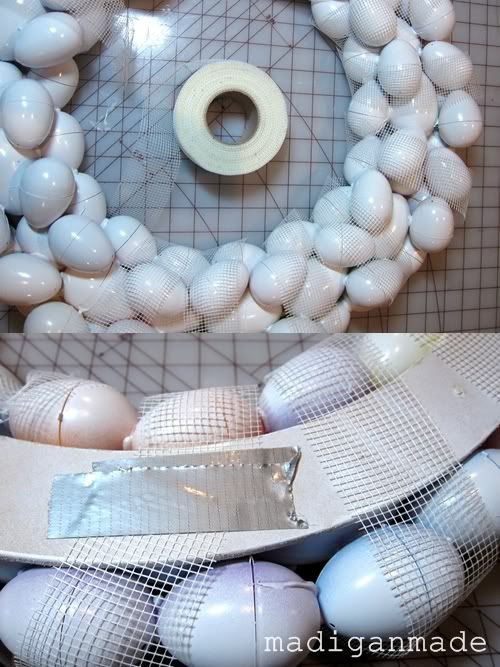
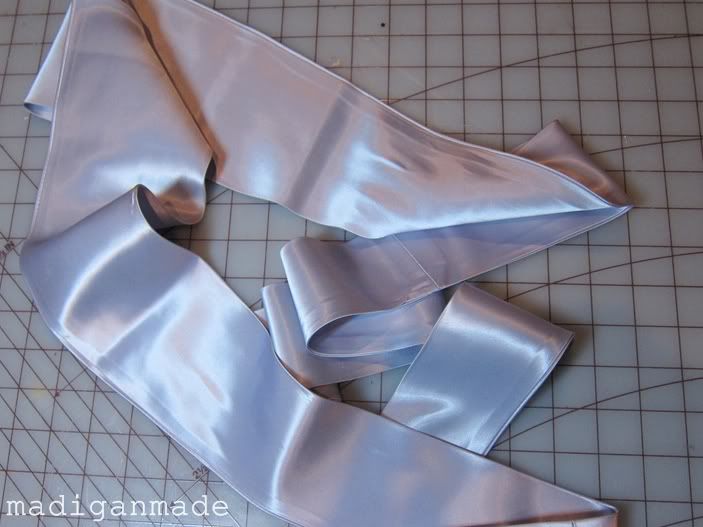
I tried using traditional ribbon around the entire wreath, but it did not look quite right to me. I’m so glad I saw the dry wall tape on our workbench. It was the perfect solution! I love how the dry wall tape does not completely obscure the eggs but adds another layer of white texture to the wreath.
This wreath is a simple and big statement. It will be perfect for our front door this Easter.
It always amazes me what a little hot glue and spray paint can do!
If you like this project
, I encourage you to stop by Madigan Made and say hello! You also are welcome to follow me on Facebook, Twitter or StumbleUpon. I enjoy sharing ‘behind the scenes’ tidbits and great ideas I find on other blogs.