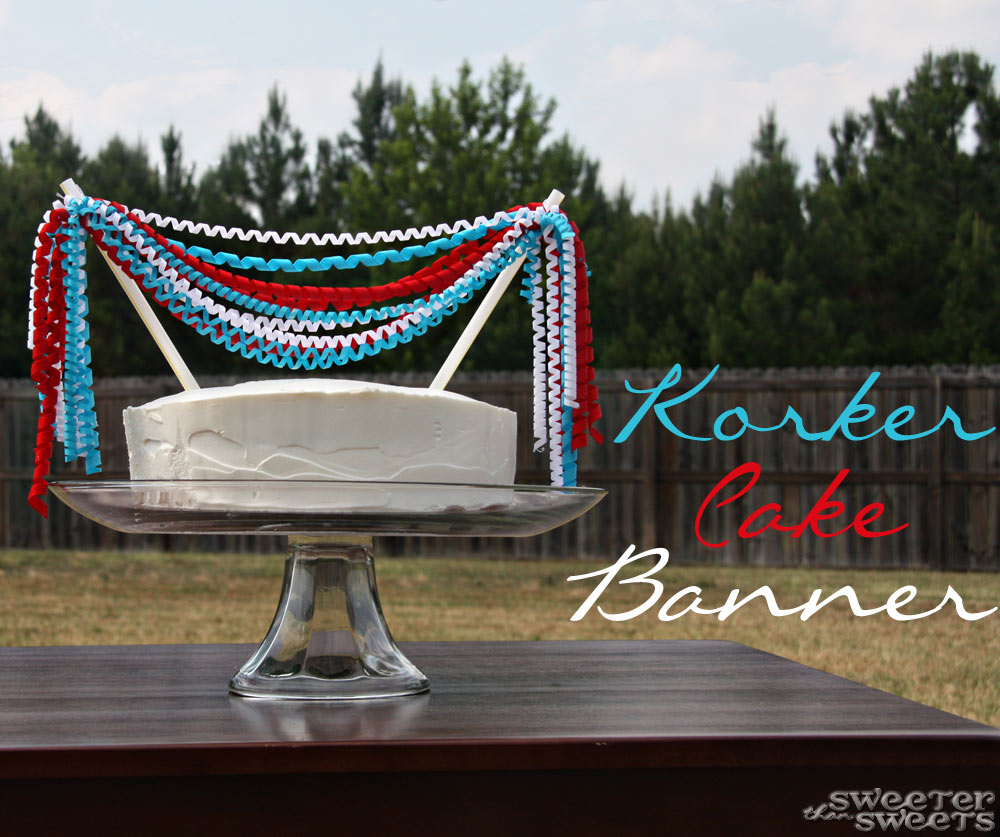
Hi! I’m Tricia from SweeterThanSweets and I’m so excited to be here for my first guest post at The CSI Project.
I have always loved creating (scrapbooking, baking, crafts) but it wasn’t until my daughter was born 2 years ago that I realized that I need to create for my own sanity. I opened my own Etsy shop a year ago and started my blog in January, where I share about my love of crafts, travel, food and more! So I was making korker bows one day when I noticed how cute the korkers look before you cut them into tiny pieces… and thought, why not make a cake banner out of korkers?

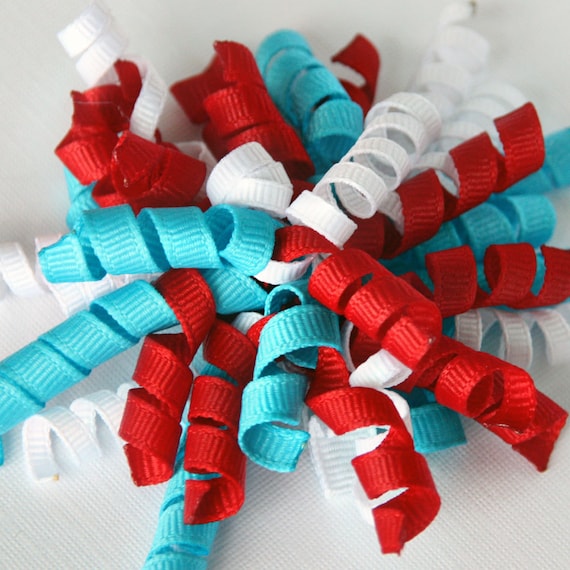
The first thing we’re going to do is curl the ribbon to look like korkers. Korker bows are those adorable hair bows with curly-cue ribbons:
Preheat your oven to 275 degrees Fahrenheit. Check to see if your dowels will fit in your oven. If not, cut the dowels to the right size. Take one end of ribbon and wrap it around a dowel a couple of times. Then secure it to the end with a clothespin.

Start wrapping the ribbon somewhat loosely, then push it upwards to get as much ribbon on the dowel as possible without overlapping the ribbon.
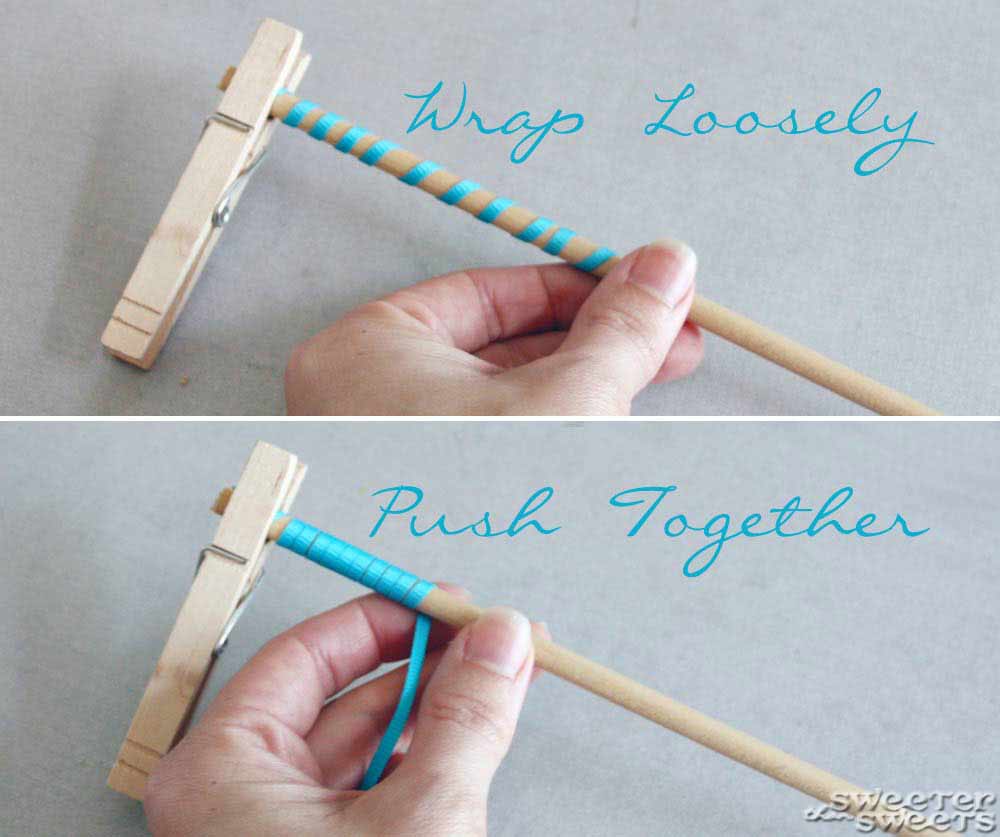
Keeping wrapping and pushing together until you get to the end of the dowel, then use another clothespin to hold it on. Repeat with as many ribbons as you want.

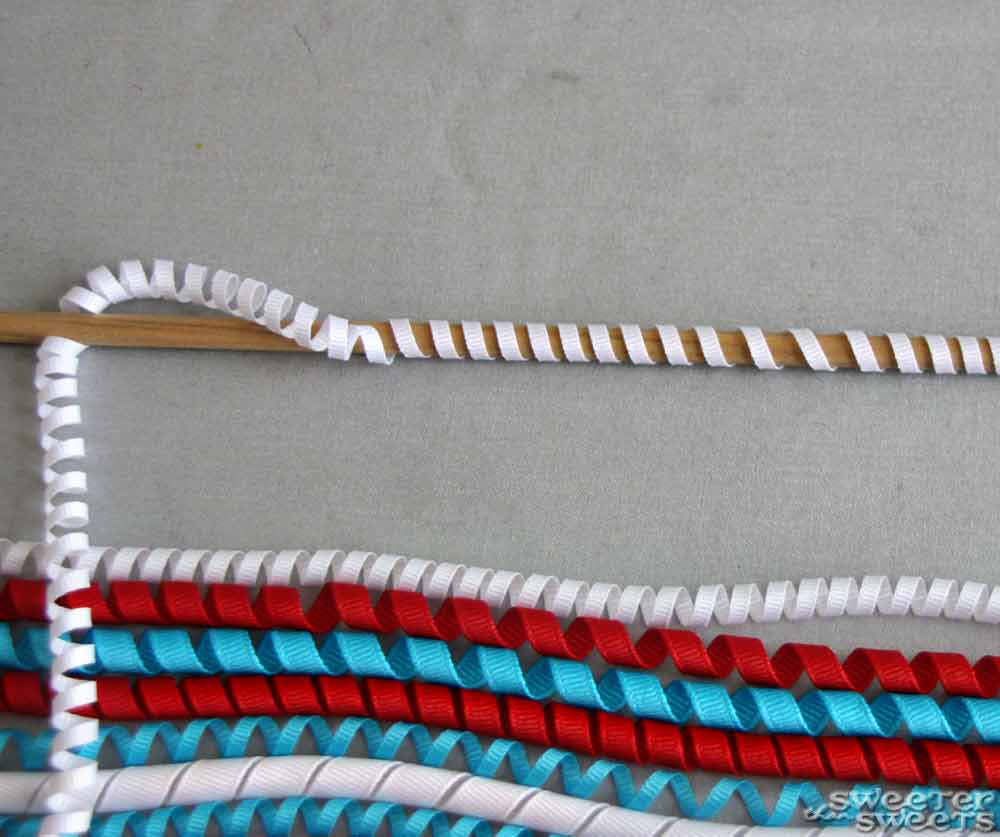
To help the ribbon keep its korker shape, spray with some spray starch (optional). Then place the dowels on top of a cookie sheet and bake in preheated oven for 25 minutes.

Take the cookie sheet out of oven and let ribbon cool on the dowels, then spray with more spray starch. When they are cool and dry, start unwrapping carefully so as not to tangle or otherwise mess up the cute korker shape of the ribbon. I twist it in the opposite direction to loosen and take it off the dowel little by little.
Now you want to pass a flame quickly over the ends of each korker to seal and prevent fraying. My ribbons turned out to be all different lengths since my dowels were different lengths but I like the look of it.

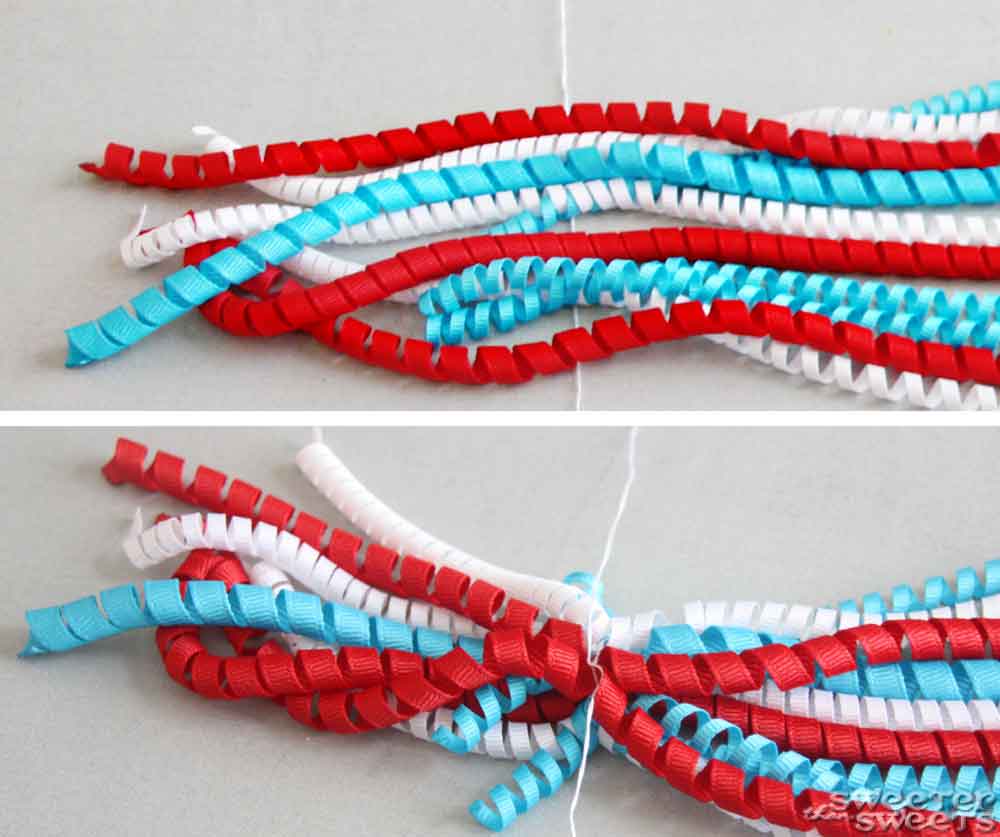
Lay all the ribbons out on a flat surface. Slide a piece of string or embroidery floss underneath one side, making sure to catch all the ends of your ribbons. Then tie a knot on one side. (I found it worked better to just tie one side of the ribbons, then start attaching it to the cake, then tie the other side.) Don’t cut the string.
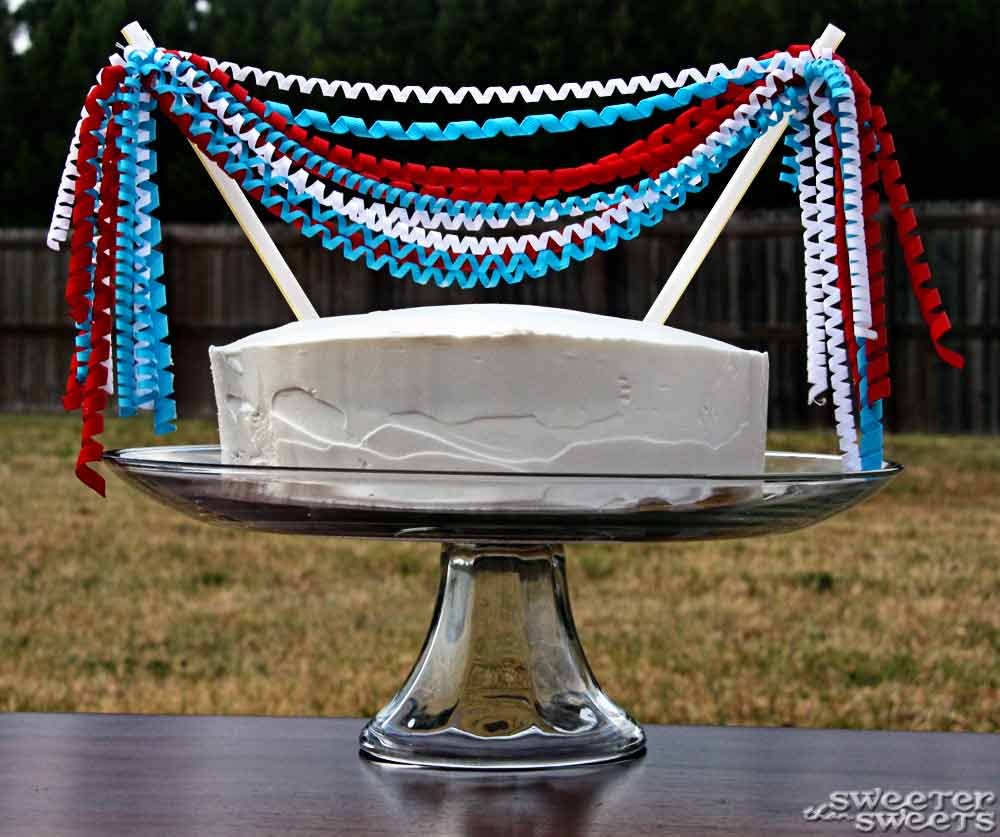
Now put your straws or chopsticks into the cake at whatever angle you want…just be sure they’re in the cake deep enough to support the weight of the ribbons (trust me, you’ll know when you start attaching the ribbons if they need to go deeper).

So that the string doesn’t slide right down the straw, put a dollop of hot glue at the top of each straw. I let it dry and used the dollop just for the knot to rest on, but you could just glue the knot right on there to really secure it to the straw. Attach the first side of ribbons to one straw and try to keep the other end of the ribbons away from your yummy frosting.

Once the first side is on the cake, you’ll be able to tell where the other knot will need to be. On my first attempt, I tied both knots ahead of time and ended up cutting one out and re-doing it once the first side was on the cake. Now tie the other ends of ribbon with your string and attach it to the second straw. Trim (and heat seal) ribbons again if necessary. Ta-da!
This Korker Cake Banner was fun but it’s got me thinking about other ways of decorating with korkers, too: party tables, miniature streamers hanging from doorways, garland on a kid’s table… hmmm, what else can you think of?

Want to see more of my projects? Follow my blog, friend me on Facebook and check out my Etsy shop!
