Hey Everyone! My name is Carissa and I blog at Carissa’s Creativity Space, where I “explain it all” about my crafting, cooking, and [greenish] parenting adventures.
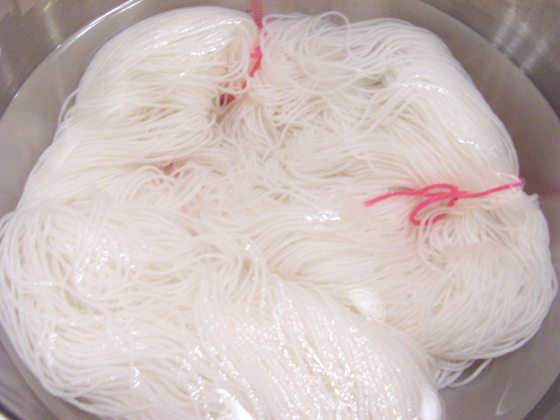
See this yarn? I dyed it in my crock pot! No kidding.
I love this process because it uses food (and kiddo) safe ingredients AND it’s the totally lazy way to dye yarn. Just like with slow cooking food, you set it up and forget about it for a few hours. But first, here is some “Yarn Dyeing 101.”
What kind of yarn this is going to work with
This process will only work on protein-based fibers….meaning a fiber that came from an animal. Wool, alpaca, silk, etc. This process will not work with plant-based fibers like cotton, flax, bamboo, etc. It can be a mixed fiber (the yarn in my photos is a 75% wool, 25% nylon blend) but it needs to be at least 50% protein fiber.
Some other important things to know about working with yarn…
You have to be nice to your yarn to get it to behave (“behave” meaning not end up in a wadded up, felty mess). Three things make yarn felt:
- Extreme temperature changes (going from very hot to very cold quickly and vice versa)
- Agitation
- Soap
These are the things we want to avoid. So throughout this process, handle your yarn gently and remember not to take cold yarn and plop it in super hot water, or take it out of a hot crock pot and run it under cold tap water. Got it? Cool! Let’s get started:

What you’re going to need:
To dye yarn in your crock pot, you’re going to need:
- Yarn made from at least 50% animal fiber like wool, alpaca, etc.
- Waste yarn (yarn scraps not made from protein fiber. Cotton or acrylic are great)
- Food coloring (I like Wilton’s food color paste)
- Vinegar (white vinegar is cheap and fabulous for this)
- Slow Cooker
- Optional:
- Gloves (if you don’t like having blue hands)
- Crockpot liner (if you don’t like having a blue crockpot)
- Plastic silverware for handling and stirring the dye.
Let’s get started!
My yarn came conveniently wrapped in a big circle called a hank. If your yarn came in ball form, you’ll want to get it into a hank by wrapping it around the back of a chair or the end of your table or a tool called niddy noddy if you’re a real yarn pro. Got your hank of yarn ready? Great! Lay it out in on the table and grab your waste yarn.
We want to secure the yarn in 4 different spots around the circle using the waste yarn (the pink yarn in the pics) to help keep it from getting tangled while messing with it. You want to tie it loosely so that all the dye can still get under it. Like so:

Now that the yarn has been tangle-proofed we need to pre-treat our yarn with an acid (vinegar) to help the color stick. Pour about 2/3 cup of white vinegar and 8 cups of warm (but not hot) water into a large bowl. Place your yarn on top of the water and push it straight down. Hold it down until the yarn has been saturated enough to stay under the water. Let your yarn sit in the vinegar water for at least 30 minutes.
While the yarn is soaking, you can get your slow cooker and dye solution prepped. Set up the liner in your slow cooker if you’re going to use one. Scoop out some food color paste (about a knife tip full) and stir it into about 4 cups of warm water in the bottom of the slow cooker. Use more or less color depending on how dark you want the yarn. And remember….you can always add more dye later if you want your yarn to be darker.
I’m using “violet:” Wilton’s food color paste. The purple dye splits up a bit when you’re dyeing and make some areas more blue and some more purple. I like that. Their other colors don’t split as badly and will give a more uniform result.

Once your yarn is done soaking in the vinegar water, pick it up out of the solution and lay it in the bottom of your slow cooker. Don’t worry about wringing it out or messing with it….just pick it up out of the bowl and move it over. Add more warm water until there is enough pretty dye water in the slow cooker to cover the yarn

Put the cover on your slow cooker, set it to high heat and let it cook your yarn until the dye has been exhausted from the water (the yarn will be colored but the water should be clear). Depending on how much dye you put in the water and low long you let it soak in the vinegar, this can take anywhere from 2-4 hours. It won’t hurt it to cook for longer, though. So go pick up the kids from school, run some errands, take nap and come back and check on it in a few hours.
Once the dye is exhausted, you can decide if you want to add more dye to make it darker or alter the shade. If you want to add more dye, take the yarn out of the slow cooker and put it on a plate or in a bowl. Mix more food coloring (you could even get adventurous and use a different color!) into the water and return the yarn to the slow cooker. Let it cook until the dye has been exhausted again.

Once you are happy with the color of your yarn, remove the yarn from the crockpot and place it in a colander in the sink. Allow it to sit in the sink to drain and cool off for about 15 minutes (or longer). If you have something to do, go do it and come back once you have about 10 more minutes to mess with it.
Depending on how long your yarn sat before you came back to it, it may still be warm or it may be rather cool. Before you rinse your yarn, it’s very important to touch it and see how warm it is (remember temperature shock = felted yarn). Run some water from your tap and get the water to match the approximate temperature of your yarn. Once the water temperature matches, run the water over the yarn to rinse out any excess dye that may be lurking. Keep rinsing until the water running out the bottom of the colander is clear.
Before hanging your yarn up to dry, we want to remove as much excess water as possible. A salad spinner is my favorite way to do that. Drop your fresh yarn in the basket and spin out the remaining water. If you don’t have a salad spinner, gently squeeze the yarn (don’t wring it). Once you’ve manually removed as much water as you can, hang your yarn up to dry. It can take up to a full day depending on the humidity in your area, but once it’s dry you can re-wrap it into a ball or re-twirl it into a hank.

Give your pretty yarn to a knitter or crocheter you love for the holidays or use it to knit a one-of-a-kind article for your favorite friend.

I hope you enjoyed my tutorial for how to make your own personal colorway of yarn using your slow cooker! A big thanks to Dee and the CSI gals for having me! I’d love to have you come visit sometime to check out more great tutorials and recipes over at Carissa’s Creativity Space.