Hi y’all! I am Coley and I’m thrilled to be kicking off 2012 here at The CSI Project!
My little home on the web is called Coley’s Corner and I share craft projects, recipes, cool photos, “drab to fab” makeovers, and write about and advocate for children with special needs, most specifically my son Noah who has cerebral palsy, epilepsy, and autism.
A few of my most popular/favorite posts are:

Simple but Cute Teacher’s Gift Idea (with free printable)

So in keeping with this week’s theme of using left over Christmas items to create something useful, I’m going to show you how to create something that your kiddos will enjoy and you will use a lot!

These Activity Tins are created using tins that you may receive over the holiday season filled with treats. By revamping these tins using chalkboard paint, you will create a useful activity tin that you can keep in the car for road trips, grab and bring in a restraunt, or even pull it out and take it in church to occupy your little ones.
To get started, you will need:
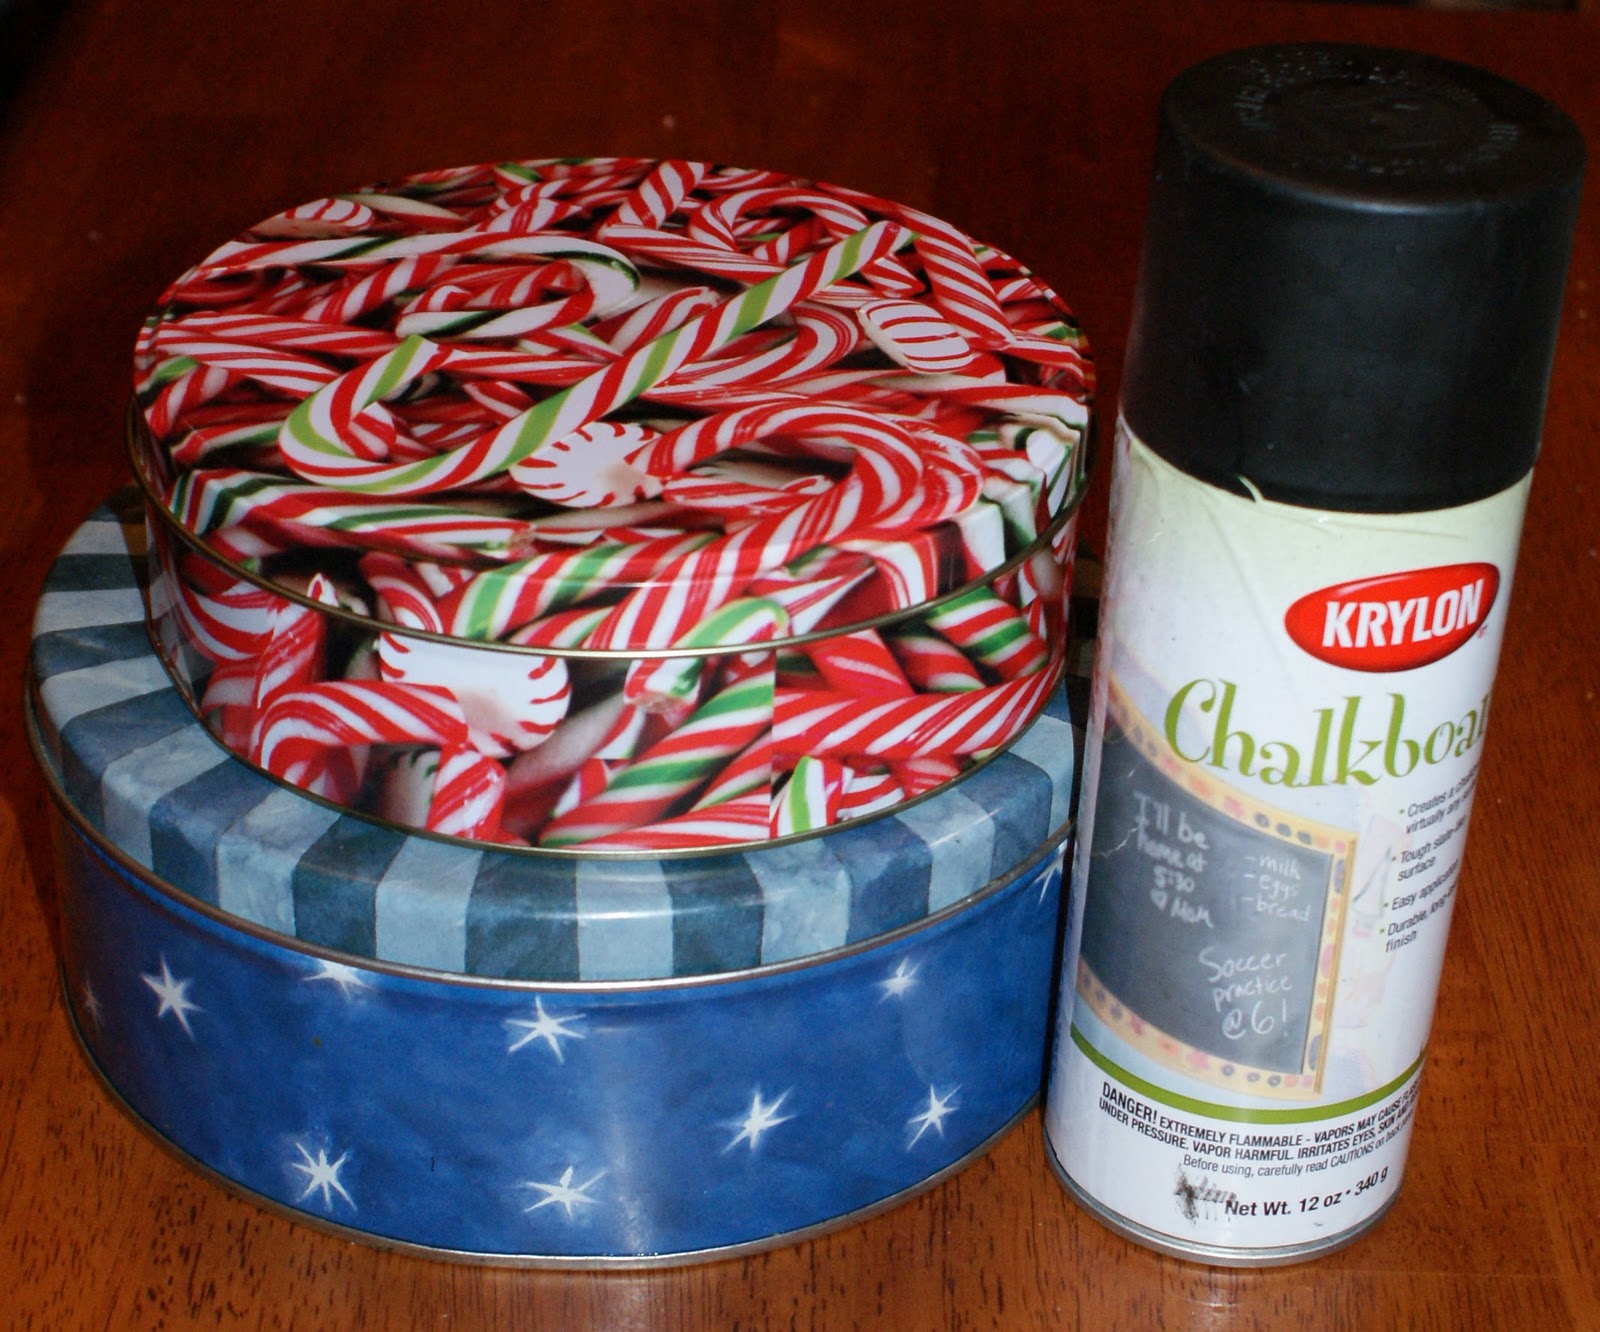
leftover Christmas tins (or look for some on super clearance)
chalkboard spray paint
chalk
stickers and/or ribbon to embellish the tin
crayons, paper, stickers, small toys, and tissues to fill the tin and occupy your kiddos
What You’ll Do:
1. Clean the inside and outside of your tin. I was a bad spray painter and did not prime this first because I was short on time. Typically, I try and prime all projects first. Once you’ve primed, spray paint the tin with your chalkboard paint. You need two coats to create the chalkboard finish.
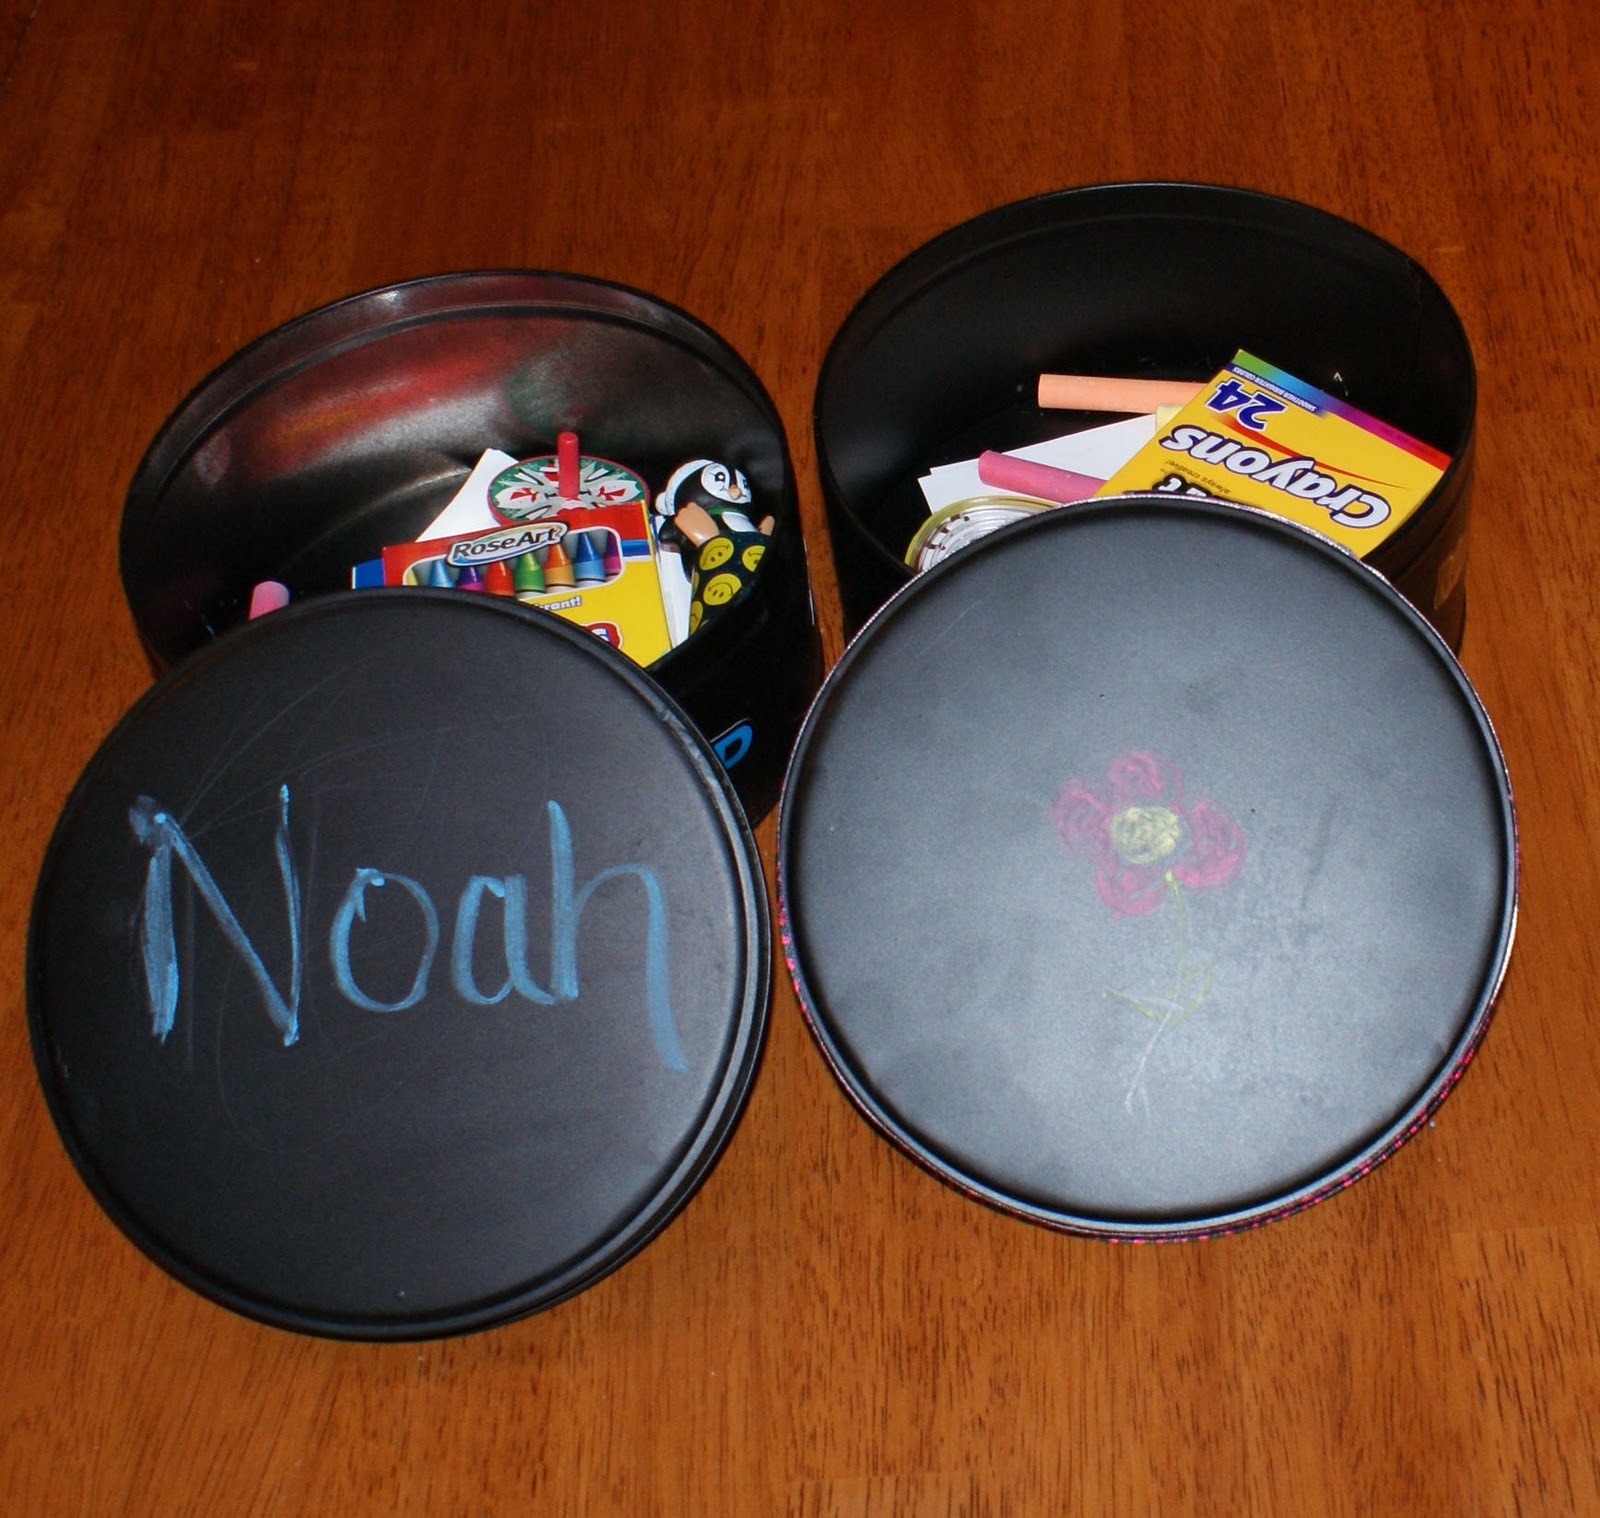
2. Let your paint dry and then follow the instructions on the bottle to “break in” the paint. I just rubbed the side of a piece of chalk all over the tin, wiped it off, and it was good to go!
3. Next comes embellishing! My son loves all things baseball so I used baseball stickers on the side of the tin. I did a girly tin using rock star and diva themed stickers. I did not have any problems with the stickers adhering to the tin as is but if you do, you could add a little glue to the back of the stickers. On the girly tin, I also glued ribbon on the edge of the lid of the tin.
I purposely did not embellish the lids of the tins so that kids can use the chalk and draw on the lid.
3. Fill the tins with fun things for your kiddos such as small toys, bubbles, stickers, crayons, chalk, etc. Don’t forget some tissues so they can wipe off their drawings and draw again later!
I hope you enjoy making this project and that your kiddos enjoy playing with it!
I’d love if it you’d drop by Coley’s Corner and say hi sometime.
Happy New Year! May 2012 bring you lots of creativity and crafting opportunities!
~Thanks Coley. So excited that you have joined the CSI family and so glad I found you and your wonderful blog.
Thanks for spending your day at the CSI Project!!!!
Come back sometime!