Hey guys!
I am so thrilled to be guest posting on The CSI Project today!
I’ve been participating in it since it started and absolutely love having a fun challenge each week to keep my creative juices flowing!
I’ve been participating in it since it started and absolutely love having a fun challenge each week to keep my creative juices flowing!
I’m Kelsey from Tattered and Inked where I blog about DIY projects, furniture transformations and offer some fun free printables!
To be honest, I was a little stumped as to what I could do that would incorporate left-over Christmas items.
I didn’t really buy a whole lot of ‘new’ christmas decor or packaging- I tried really hard to reuse and come up with ways to use things I had around the house this year for the holidays.
But what I did have leftover was tons of paper.
If you’re like me and decided to make a lot of gifts this year then you might be in the same boat as me!
I bought a pack of scrapbook paper to use for cards, wrapping, decor and a bunch of gifts and was left with a pile of scraps.
So I decided to put them to work- I hate throwing things away 🙂
I ended up filling an entire Mason jar with these guys…
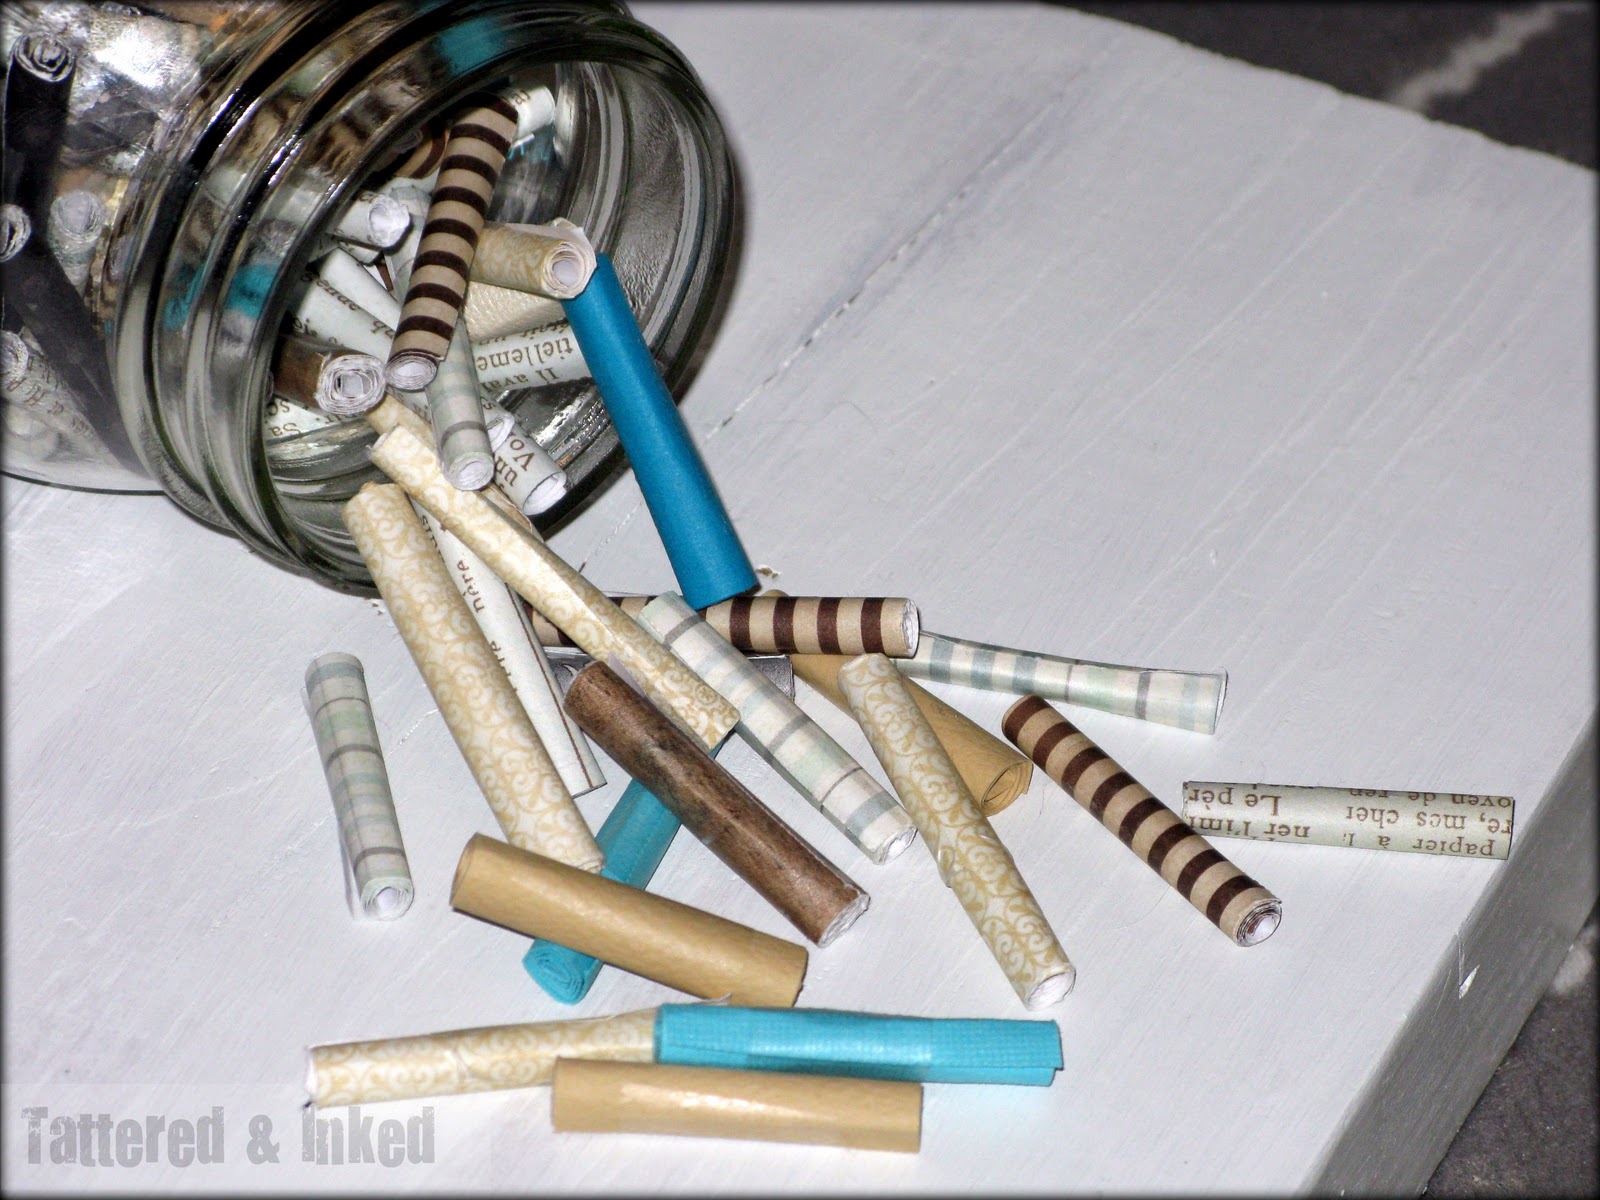
And the best part is, all you need are small scraps!
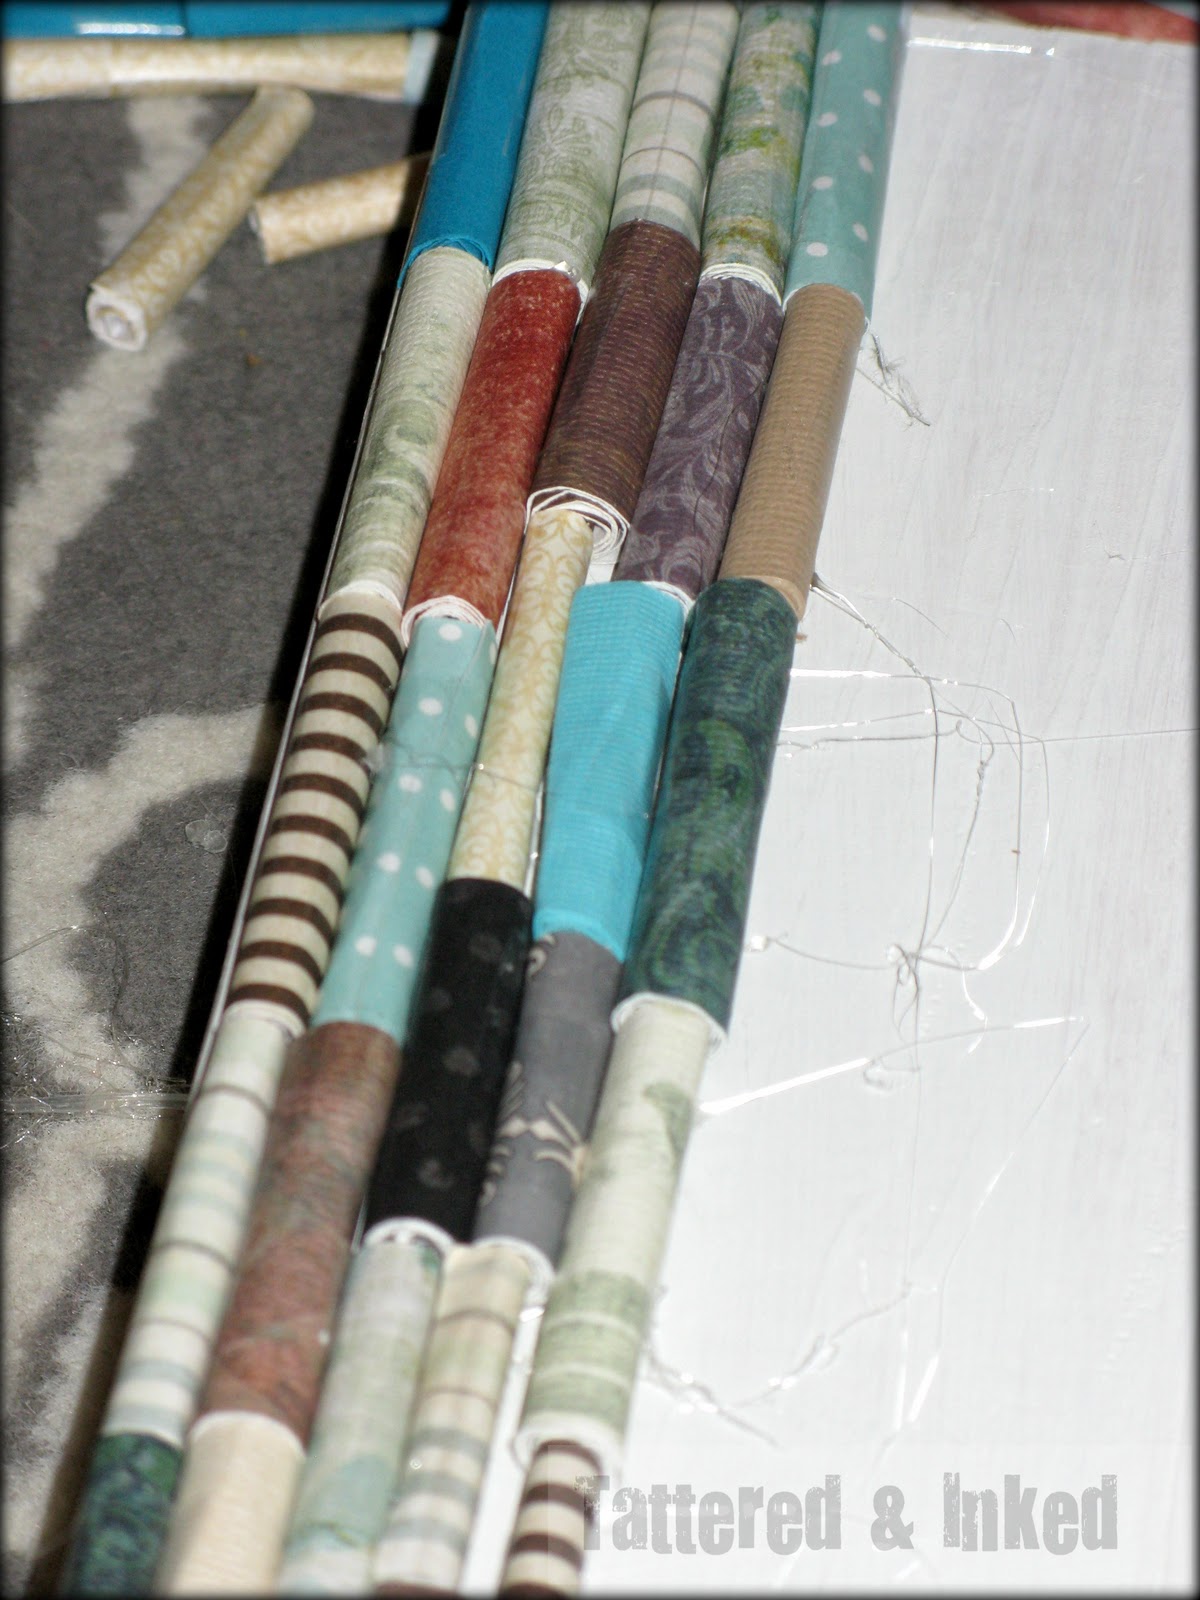
I cut them into strips- varied the width of them to get longer and shorter ones,
and then rolled them together.
Be careful to roll them as tight as you can which is tough with cardstock paper and thicker papers.
Wrapping paper and thin pieces are a breeze.
So they’re your friends 🙂
Then I just used a small piece of tape to secure the ends down.
It’s a little tedious but a perfect craft-and-watch a guilty pleasure type activity!
And depending on the size of ‘frame’ you’re doing, you’re going to need quite a few…
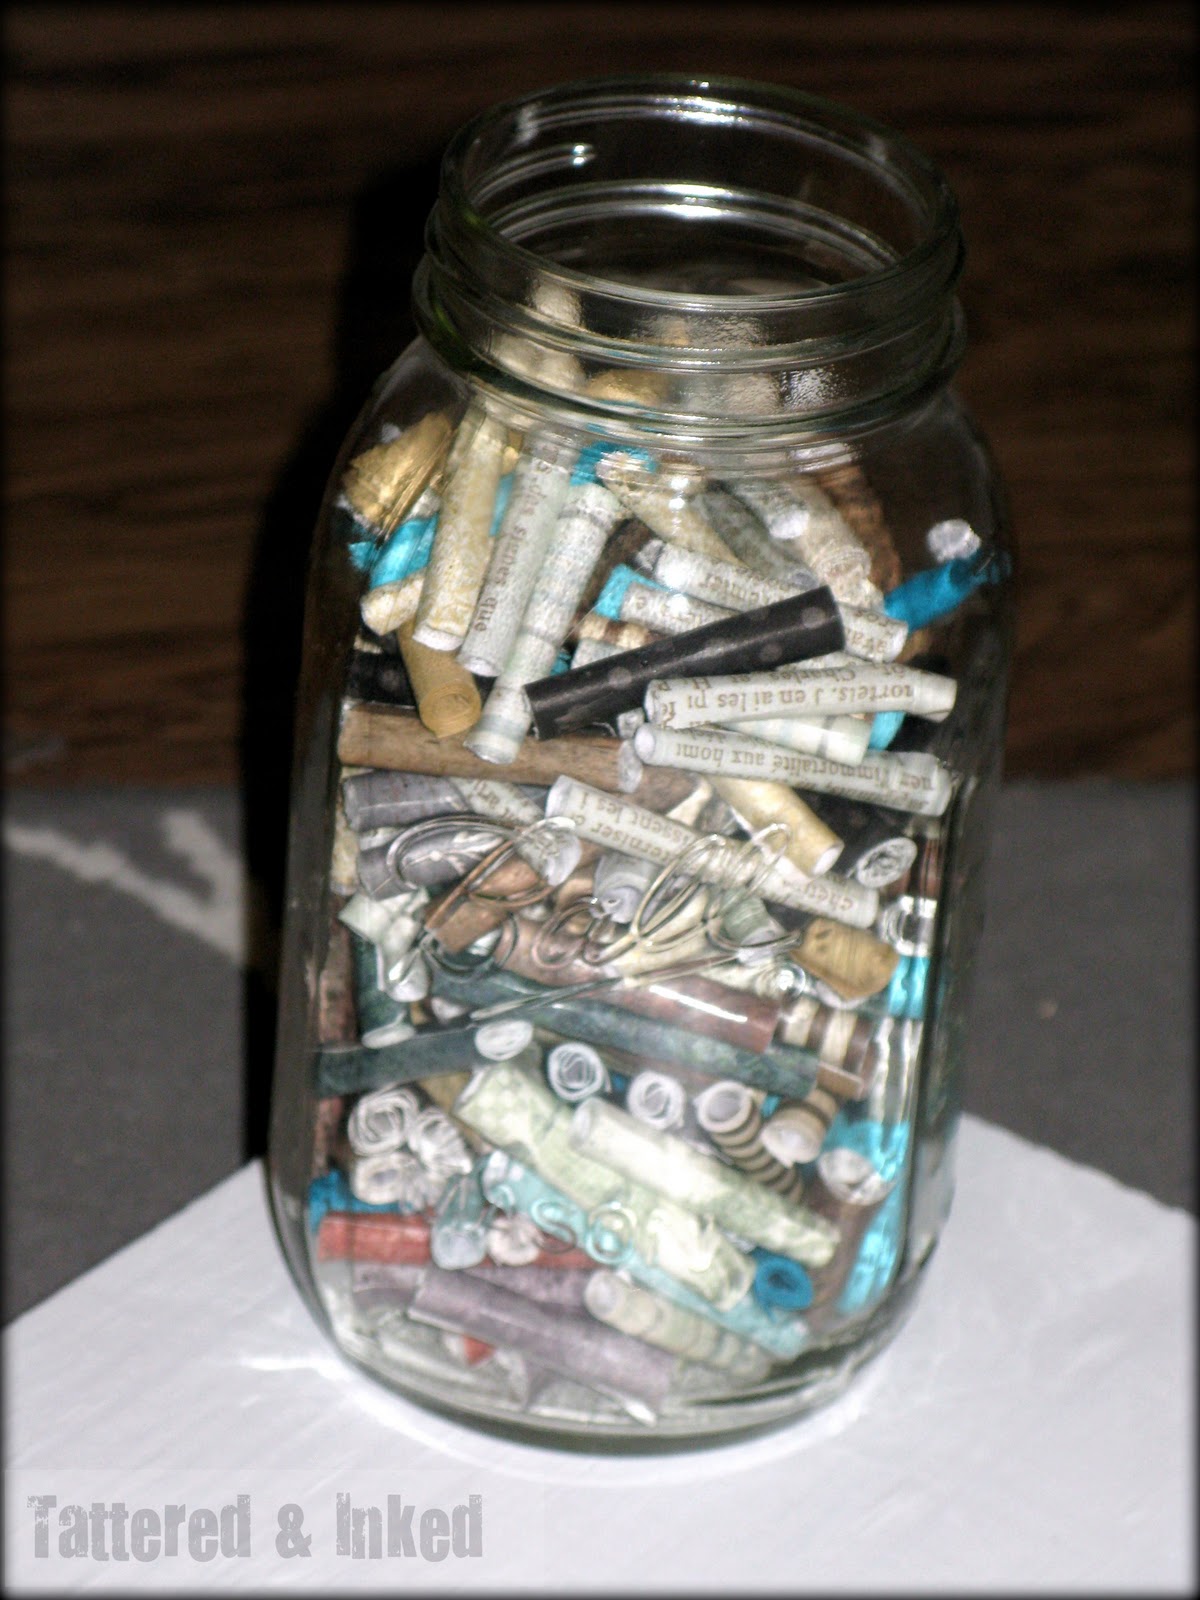
Don’t they look pretty in the jar??
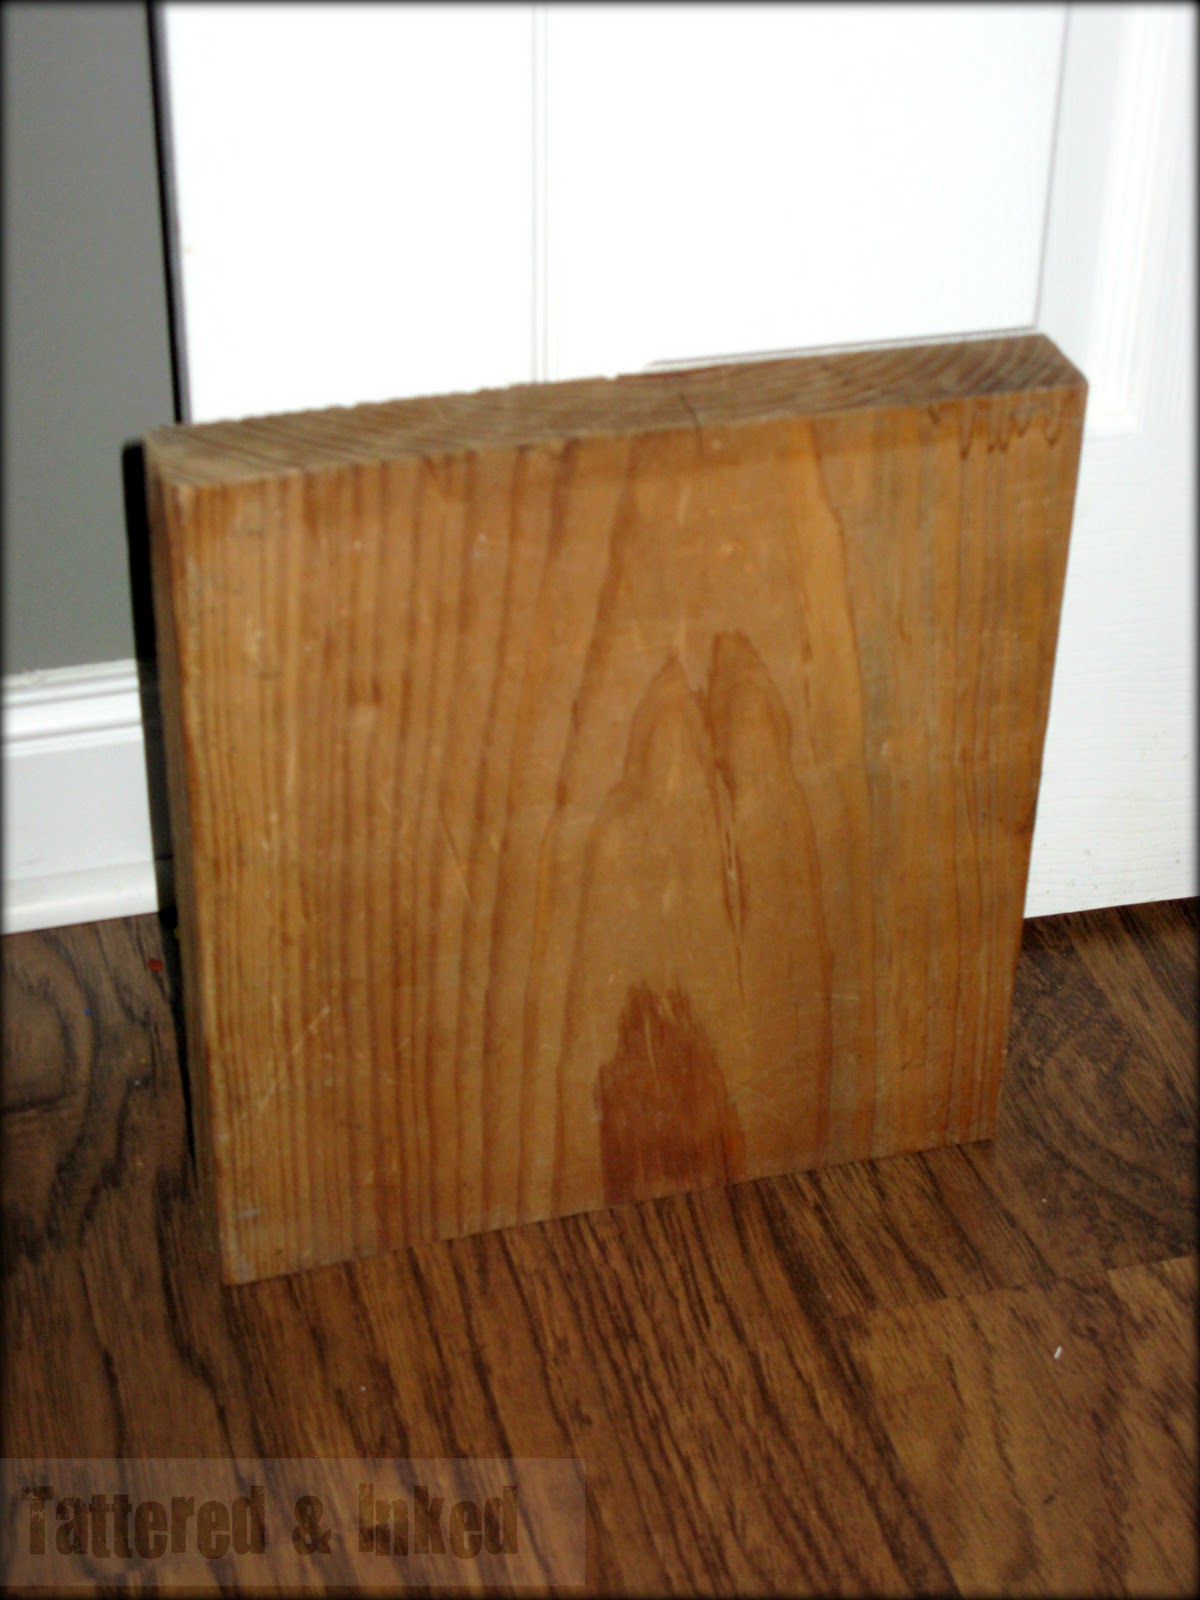
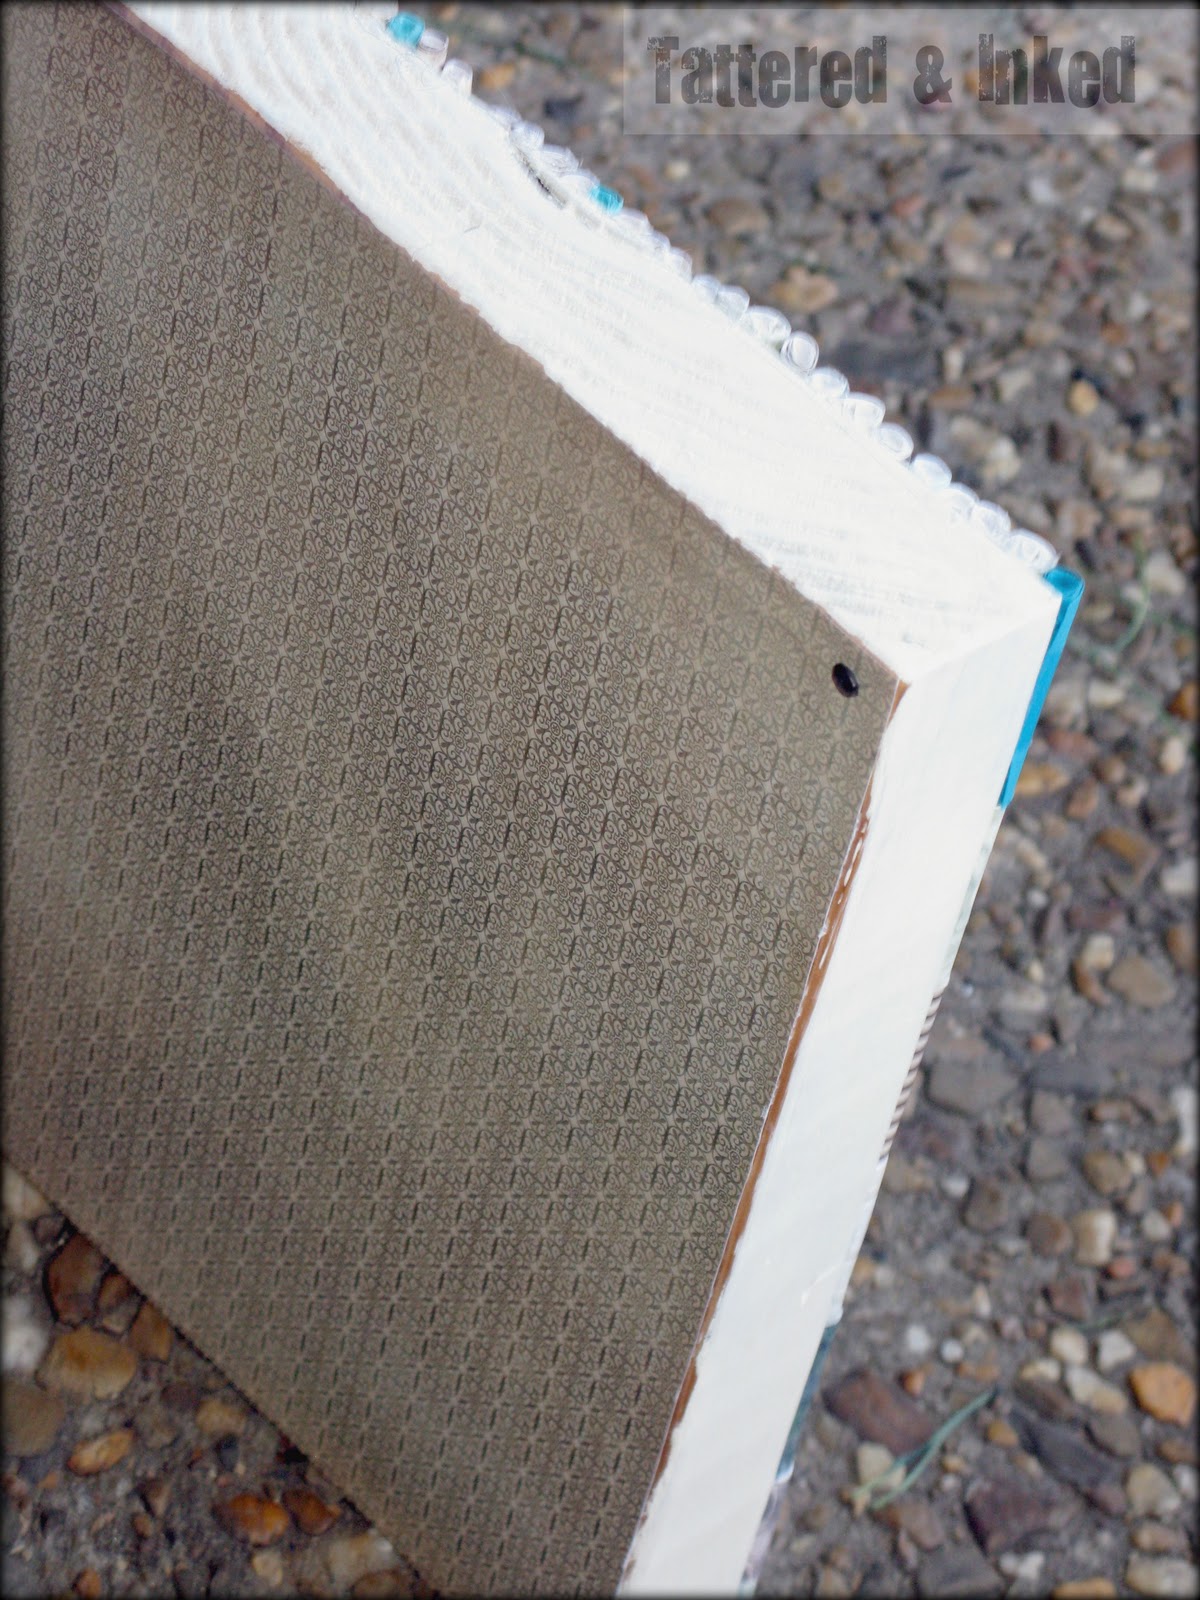
I also had a scrap piece of wood on hand from a Christmas sign I did…
so I decided to use this as my ‘frame’.
Of course, you can grab any type of frame as long as it’s flat on the front.
Or you can grab a cabinet door or scrap wood like I did.
I liked this piece because it’s thick enough to stand on it’s own.
I went ahead and painted mine a glossy white.
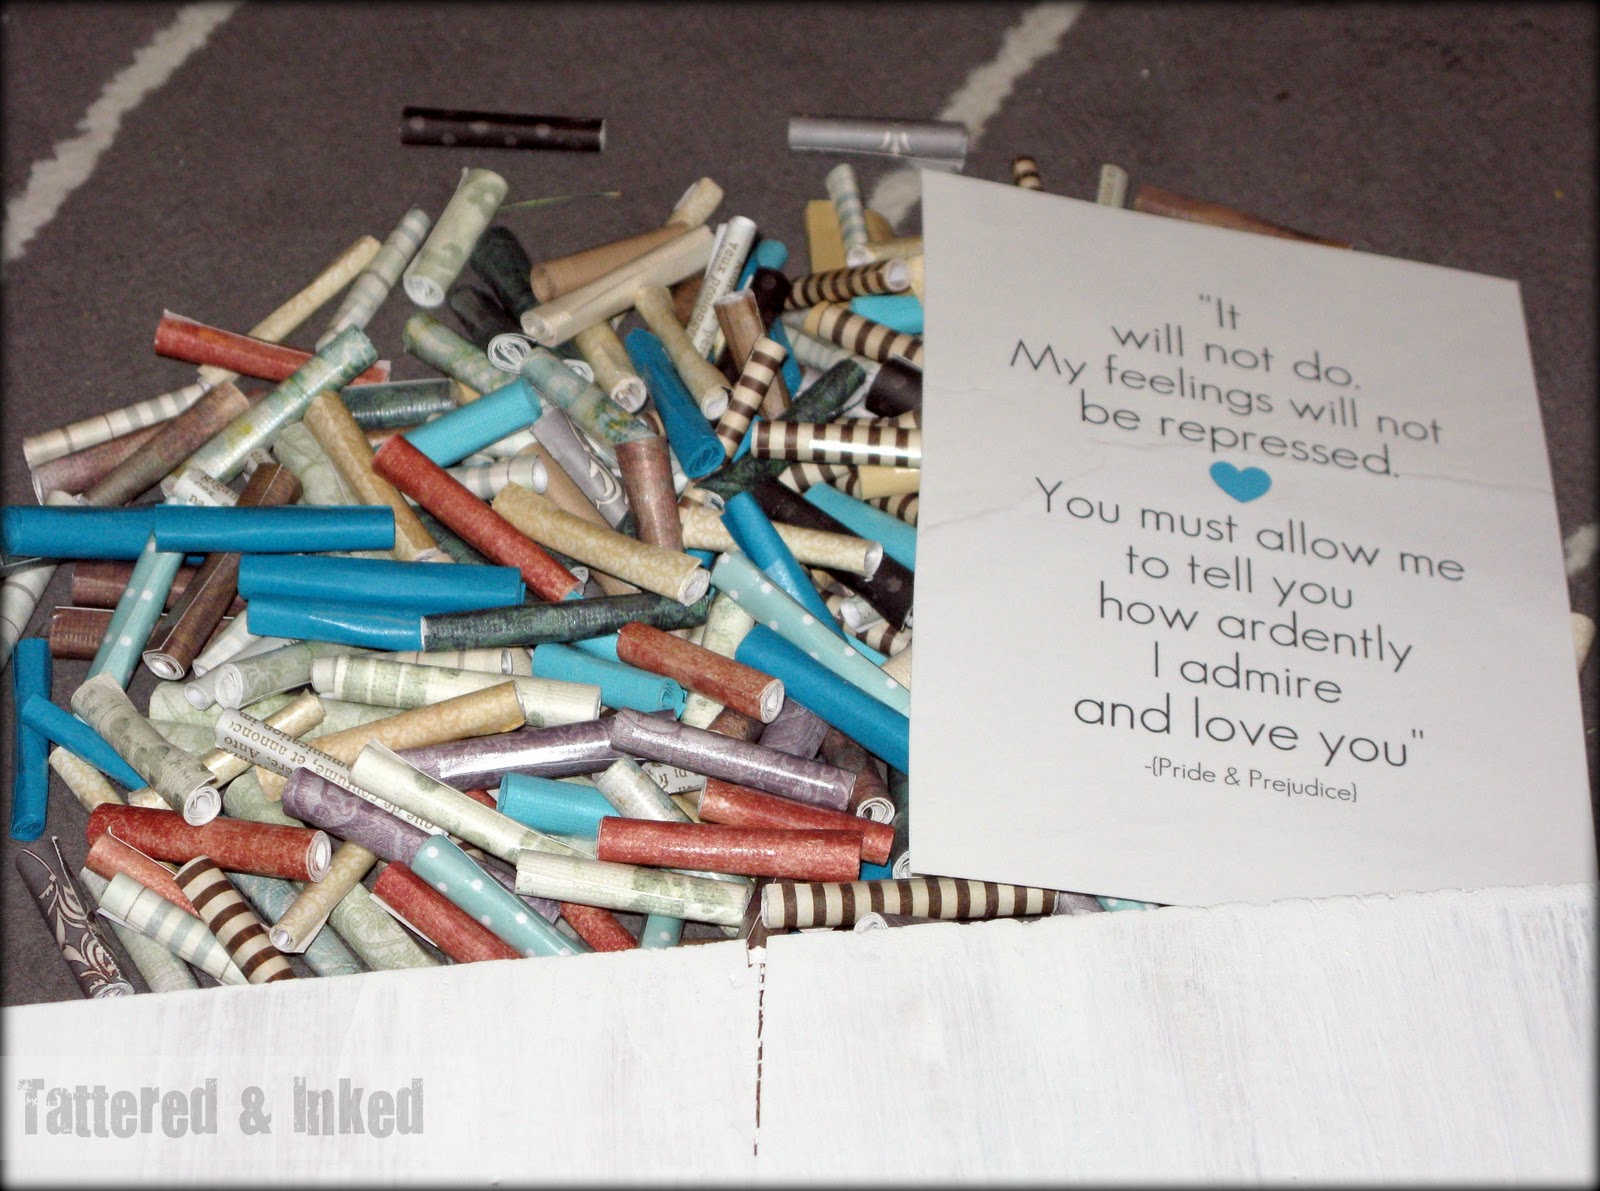
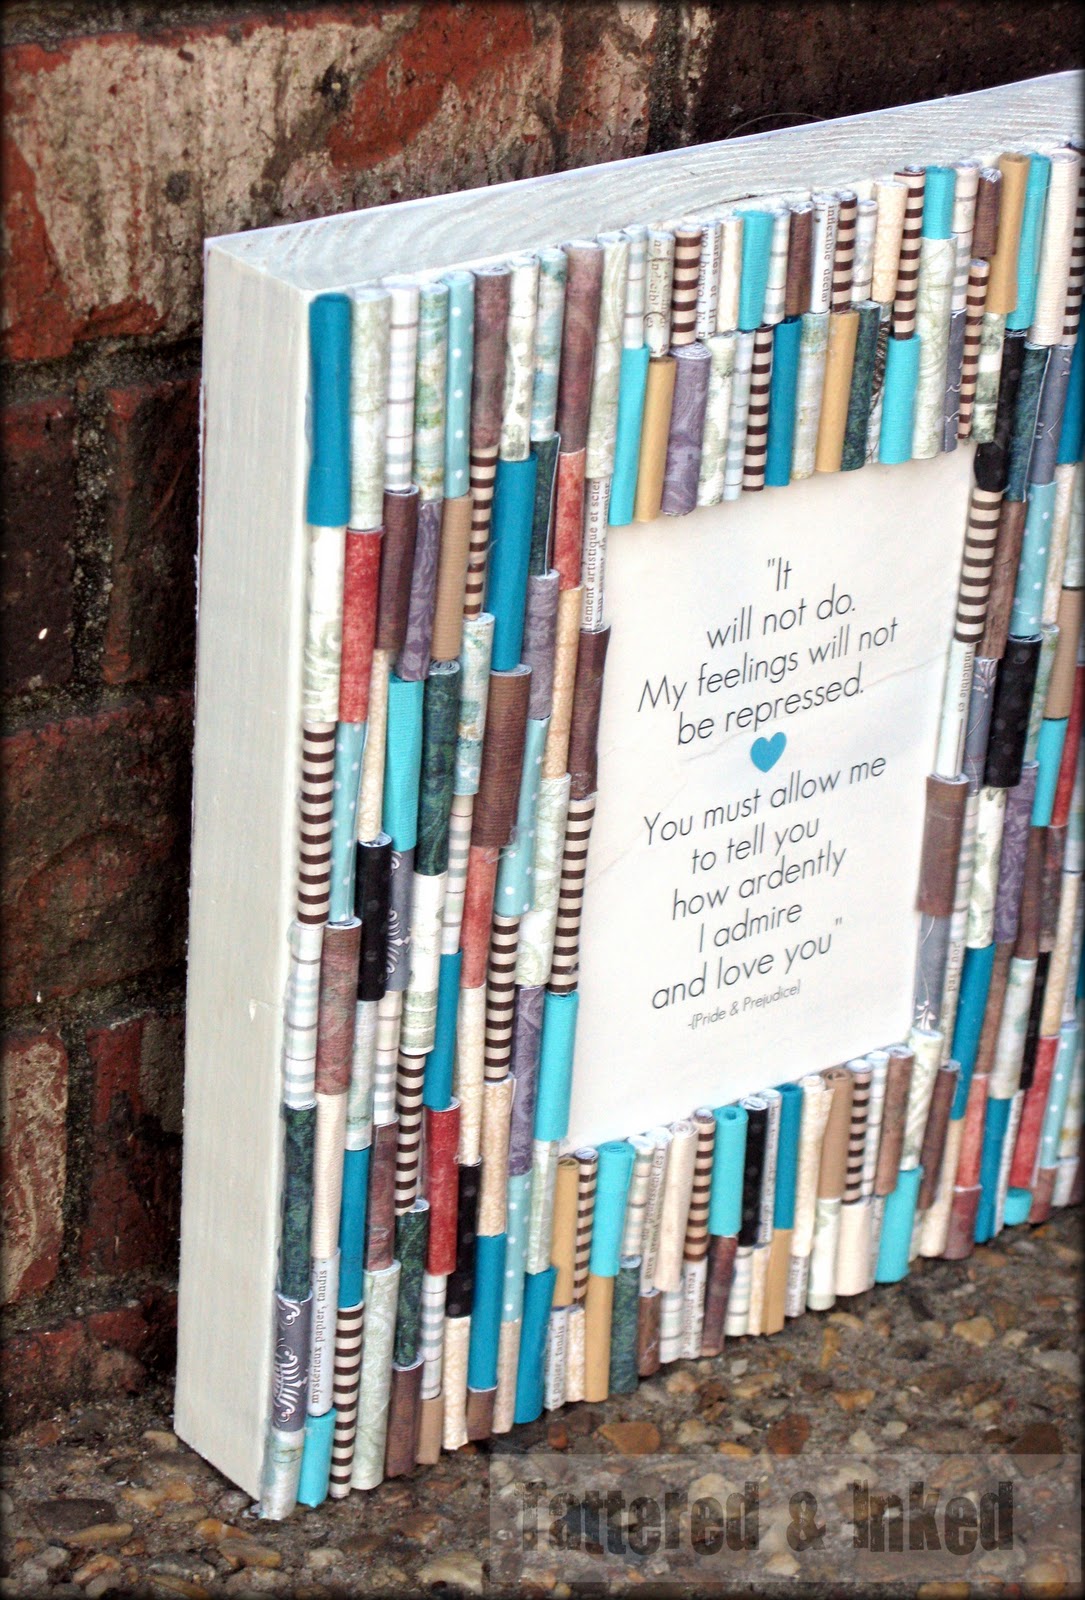
For the middle of my ‘frame’, I whipped up a quick quote to print out.
(I told you I loved making printables!)
This one is one of my favorite quotes from Pride and Prejudice- love it 🙂
My plan is to include this in my soon-to-be-redone master bedroom so it’s okay that it’s mushy.
Plus it would be great to put out on Valentine’s Day too!
(be on the lookout for a free printable for you guys on the blog soon)
I used tons of different patterns and colors on my frame but it would be gorgeous in just a couple
or black and white would be fabulous!
I adhered my picture to the middle and then just started lining them up.
I started on the left and just worked my way down each row and started back at the top for the next,
putting a line of hotglue down as I went.
Don’t worry about them fitting perfectly- I trimmed a couple of mine to fit.
I just made sure to vary the patterns as much as I could.

Aren’t those strings lovely?
Don’t worry, most get covered up and if not, just pull them at the end!
I did both sides first and then came back to fill in the middle portions above and below the picture.
The result is a fabulous, funky new frame!!

I love all the texture going on.
Pictures don’t do it justice 🙂

I also added a piece of paper to the back so that it doesn’t look bad from behind.
Nobody wants that, right?
I really think the chunkiness of the frame keeps it from being too crazy busy.
I love the simple white sides against all the color.
I hope this gave you a fun idea for any of your paper scraps you have piled up!
I’d love for you to come visit me at Tattered and Inked or stop by my Facebook page to see fun sneak peeks and join the conversation!!
Thanks so much again for having me and I hope to see you around 🙂

Kelsey @ Tattered and Inked
~~~~~~~~~~~~~~~~~~~~
{Tatteredandinked.blogspot.com}
~ Thanks Kelsey. It is about time you and your wonderful blog is featured on here. I love your blog!!!
Go by and say hi to Kelsey!!!