Hello CSIer’s!! I am so excited to be a guest poster!!! I am over at CreationsByJune and also have an Etsy store by the same name.
As you know “Ombre” is the theme this week.. I had not even heard of this term 6 months ago… so I had to look it up! Ombre is a color shading of at least 3-4 shades.. a gradual shift in colors. You see a lot of it with hair color right now… Next, I typed in Ombre into Pinterest… check it out, all sorts of good things!!!
With all of the projects that you could do, I thought I would go back to the basics and talk about how to dye….. ombre style!
First decision.. color.. I love red, so it was an easy choice. Now I like the liquid Rit dye.. and you also need to have some salt to use the dye, so don’t forget to have that on hand….

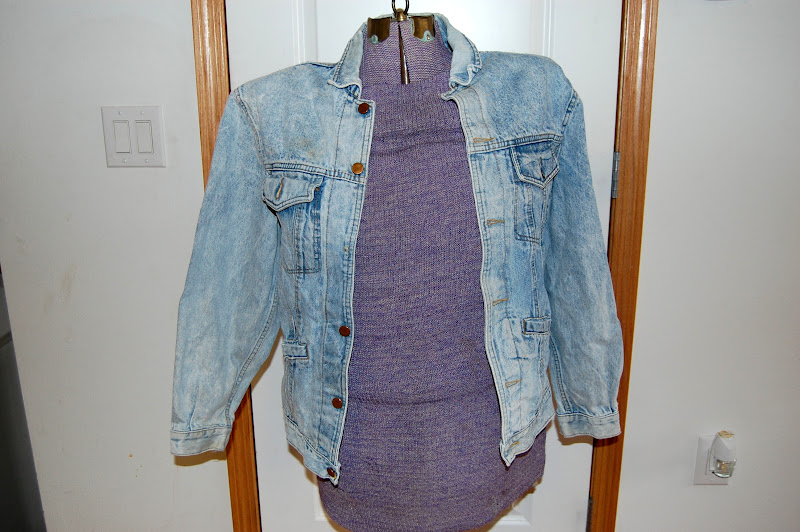
READ the directions on the bottle!!! With the ombre style of dying, you cannot dye in the washing machine, you need either a big tub, or I used the sink. If you have a porcelain sink, especially one with scratches in it, do NOT dye in it.. you will have a lasting memory and evidence of the dye job! I have a metal sink, so it worked perfect. I followed the directions, hot water, salt and stirred well to mix up the dye. With Ombre dying, you really want the graduated colors to come through, so you dye a little at a time..My first project was my old jean jacket.. I bought this jacket when I live in Germany in 1987! I loved it then, but it was screaming for a change..
I put the bottom half of the jacket in the dye and set the timer for 20 minutes….
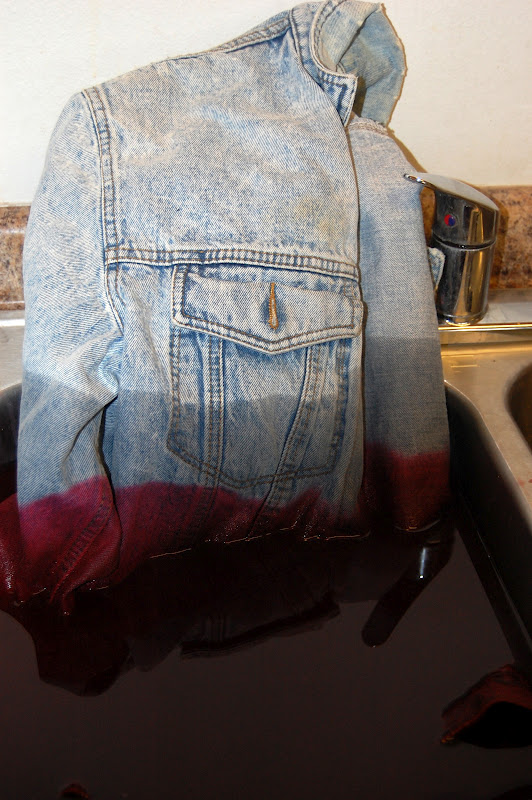

When the timer went off, I moved it down further in the dye for 15 minutes and kept on gradually soaking in increments.. After the entire thing was dyed, I just let it sit in the sink and wait for a bit. See, since I had dye, figured might as well use it! I grabbed a piece of material I had picked up ( it was on sale.. like I need an excuse!) Thought I would dye it and make a scarf… This was a little trickier, since it was a long piece of material. I rigged up a hanging system, so I could soak a little at a time in the dye. It looks not the most professional in the world, but wanted to show so you could see how to rig something in your house…

Isn’t that just beautiful? But it works!

Again, a little at a time, moved down every 15 minutes or so.
After you are done with the dye process, you have to rinse out the fabric. To make it easier on myself, I put all the dyed fabric and jacket into a garbage bag and carried it to the washer and then washed all in cold water with no soap. I used the extra rinse cycle also. Then dry in the dryer to set the dye and you are done!
And here is the jacket…
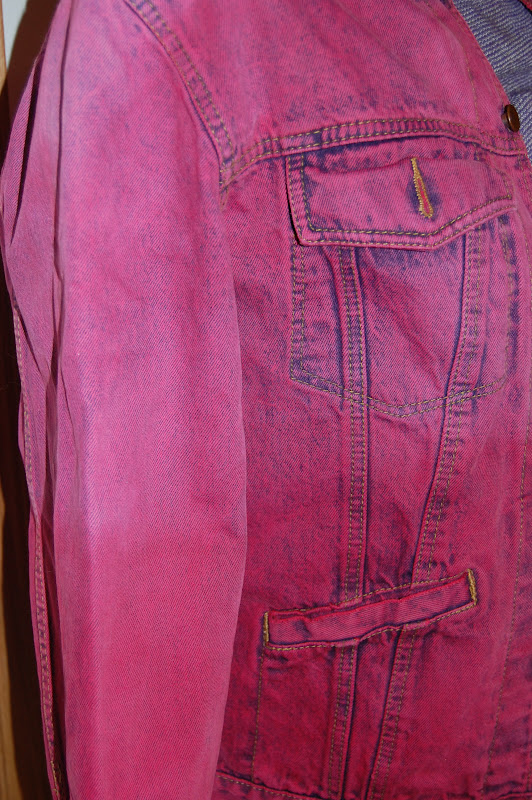
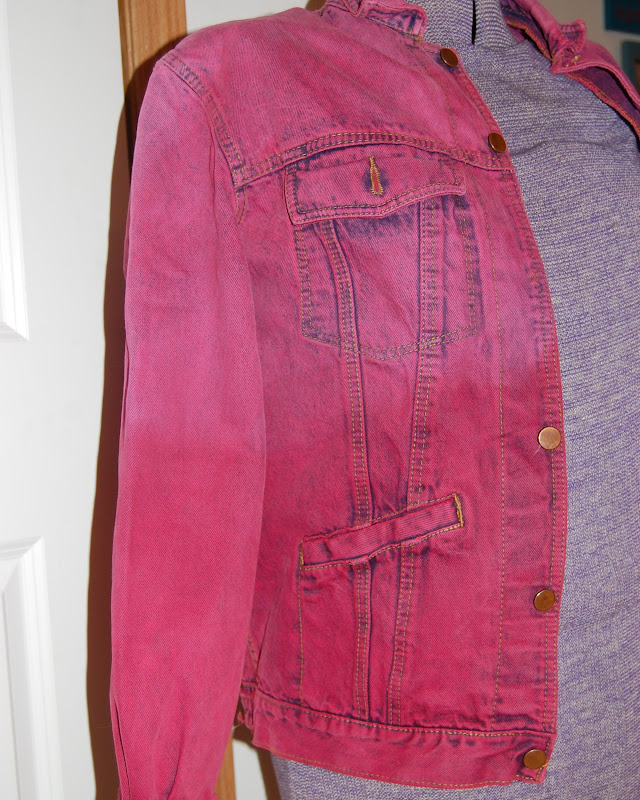

I have worn the jacket several times and have had so many comments about it! In the photos the graduation of colors is more obvious (wanted to make sure they could be seen well) but in life, it is more subtle. I even had someone ask where I bought the jacket.. which always makes me happy!
Next project, the dyed fabric. I sewed a quick scarf and ended up with this!
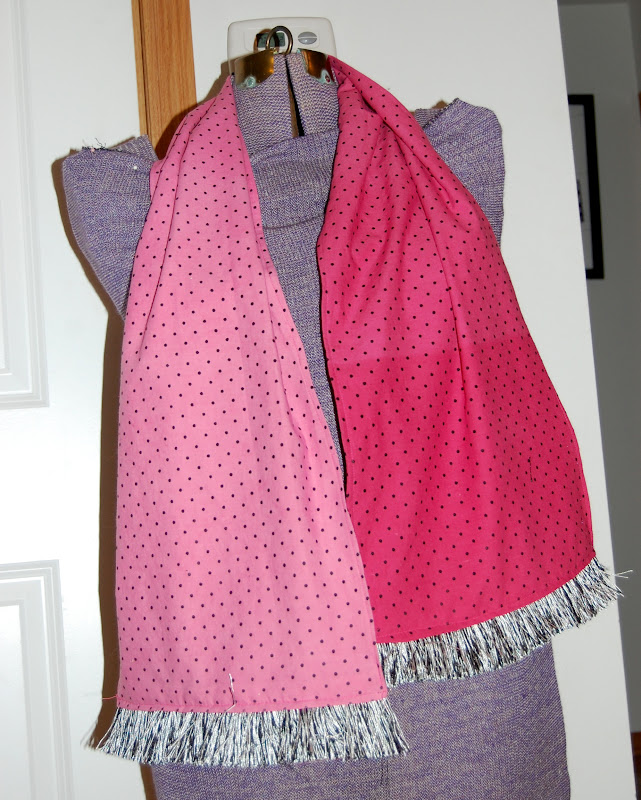
So in love with this scarf!
A couple of tips… The dye may not end up the same exact color as the bottle… my bottle was for cherry red and as you can see, it looks more hot pink! And then look at the different colors between the jacket and the scarf…. the dye will pick up different on different material types, so be prepared! If you need an exact color, do a test dye job, I am pretty flexible, so I am digging the colors and how it turned out.
Can’t find the ombre color you want? Make it yourself and have a one of a kind dyed piece of clothing that no one else could every have!
So go dig through your stash of clothes you don’t wear, think about a color change and take a chance!!!