Hey guys! I’m Vanessa and I blog about my love for glitter and glue guns at See Vanessa Craft. A huge thank you to the CSI Project for inviting me to participate in the flower project challenge, I’m so excited to be here! I created these felt flower topiaries to help decorate the dessert table at a craft party I recently hosted. They are easy to make, but require a bit of time and patience (you may not ever want to see felt again after this project is complete). The effort was totally worth the end result. Aside from a spring themed craft party, these topiaries would look great in a nursery or on top of a fireplace mantel. Happy crafting!
Materials
2 Foam Topiary Forms (found in the floral section of your local craft store)
2 Terracotta Pots (sized to fit the topiary forms)
2 Yards of Felt
Scissors
Hot Glue Gun
Instant Green Moss Cloth (found in the floral section of your local craft store)
2 Decorative Butterflies
Instructions
Step 1: Cut out several 4 inch circles out of 2 yard of felt. You can cut more circles as you go so you don’t waste felt.
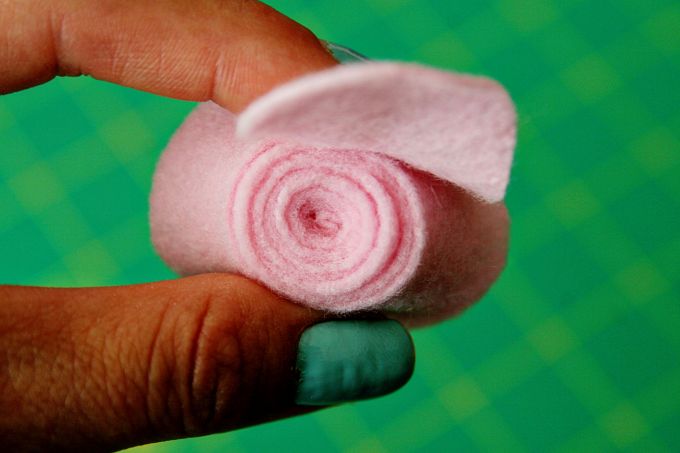
Step 2: To make a felt flower, cut a spiral in the circles as shown below. Starting from the outside of the spiral, start wrapping the felt to form a flower. When you reach the end, add a glob of hot glue to the end piece and glue it to the backside of the flower. Continue making flowers until you have enough to cover 2 topiary forms.
Step 3: Hot glue flowers onto the topiary forms, making sure that there are no gaps in between the flowers.
Step 4: Cut a piece of moss, sized to fit inside the terracotta pot. It is easiest to use a rotary cutter with moss sheets, but scissors will work too. Place the topiary form into the terracotta pot. Cut a slit to the middle of the moss circle and hot glue in place inside the pot, covering the topiary form.
Step 5: Hot glue a decorative butterfly to the side of the pot.
Step 6: Throw a craft party to show off your felt rose topiaries.


